displaying posts 201 to 225 of 388

Pages (16): first .. 8 [9] 10 .. last

Author Subject: Midlife's Rallye
midlife

Seasoned Pro

Location: Colne, Lancashire

Registered: 13 Mar 2006

Posts: 7,544

Status: Offline

Post #201
I've just emailed wossner & max speeding rods nowThumbs up

Cool

________________________________________

Get used to seeing the yellow one !!!MehMehMehMehMeh
Team 330™Cool
Team "no front end or engine"
Team "LIMITED EDITION" I live for the 306 stickerSmug
Team 0-60 in 6.44 & standing qtr in 14.808 @ 94.55mph all with std engineSmug
203bhp Corolla T-Sport daily driver stealthier than Kwai Chang Caine
Posted 14th Oct 2010 at 14:44
midlife

Seasoned Pro

Location: Colne, Lancashire

Registered: 13 Mar 2006

Posts: 7,544

Status: Offline

Post #202
daveyboy wrote:
midlife wrote:

I struggled getting the caps off on the bench, it's going to be near on impossible on the crank!
Cool


It's easy, undo the rod bolts about four turns, then tap them gently and evenly with a soft faced hammer and it will pop the caps off a treat Wink


I'll give it a blast on Friday, thanks!

Cool

________________________________________

Get used to seeing the yellow one !!!MehMehMehMehMeh
Team 330™Cool
Team "no front end or engine"
Team "LIMITED EDITION" I live for the 306 stickerSmug
Team 0-60 in 6.44 & standing qtr in 14.808 @ 94.55mph all with std engineSmug
203bhp Corolla T-Sport daily driver stealthier than Kwai Chang Caine
Posted 14th Oct 2010 at 05:58
midlife

Seasoned Pro

Location: Colne, Lancashire

Registered: 13 Mar 2006

Posts: 7,544

Status: Offline

Post #203
Hi Sir:
The torque of 3/8" ARPL19 rod bolts is 45 foot pounds with regular moly .

________________________________________

Get used to seeing the yellow one !!!MehMehMehMehMeh
Team 330™Cool
Team "no front end or engine"
Team "LIMITED EDITION" I live for the 306 stickerSmug
Team 0-60 in 6.44 & standing qtr in 14.808 @ 94.55mph all with std engineSmug
203bhp Corolla T-Sport daily driver stealthier than Kwai Chang Caine
Posted 14th Oct 2010 at 12:31
daveyboy

aka Jim Davey

Location: Southampton

Registered: 01 Oct 2007

Posts: 8,648

Status: Offline

Post #204
midlife wrote:
Hi Sir:
The torque of 3/8" ARPL19 rod bolts is 45 foot pounds with regular moly .

________________________________________

R H Davey Welding Supplies. I sell new and used welding equipment in the Hampshire area. I take on welding jobs in the evenings, ally casting repairs are one of my specialities but I can weld pretty much anything. PM me with your requirements.

Some of my services: (See my for sale threads)
Engine mount/chassis repair
Solid Beam Mounts BACK IN PRODUCTION
Harness bars
Posted 14th Oct 2010 at 13:22
midlife

Seasoned Pro

Location: Colne, Lancashire

Registered: 13 Mar 2006

Posts: 7,544

Status: Offline

Post #205
UnclenchLaugh my ass off

Cool

________________________________________

Get used to seeing the yellow one !!!MehMehMehMehMeh
Team 330™Cool
Team "no front end or engine"
Team "LIMITED EDITION" I live for the 306 stickerSmug
Team 0-60 in 6.44 & standing qtr in 14.808 @ 94.55mph all with std engineSmug
203bhp Corolla T-Sport daily driver stealthier than Kwai Chang Caine
Posted 14th Oct 2010 at 14:45
midlife

Seasoned Pro

Location: Colne, Lancashire

Registered: 13 Mar 2006

Posts: 7,544

Status: Offline

Post #206
Update time....
Well..... I took the pistons out, what a good tip to unscrew each bolt 4 turns & give them a tap with a light mallet, it worked a treat splitting the end caps from the rods.
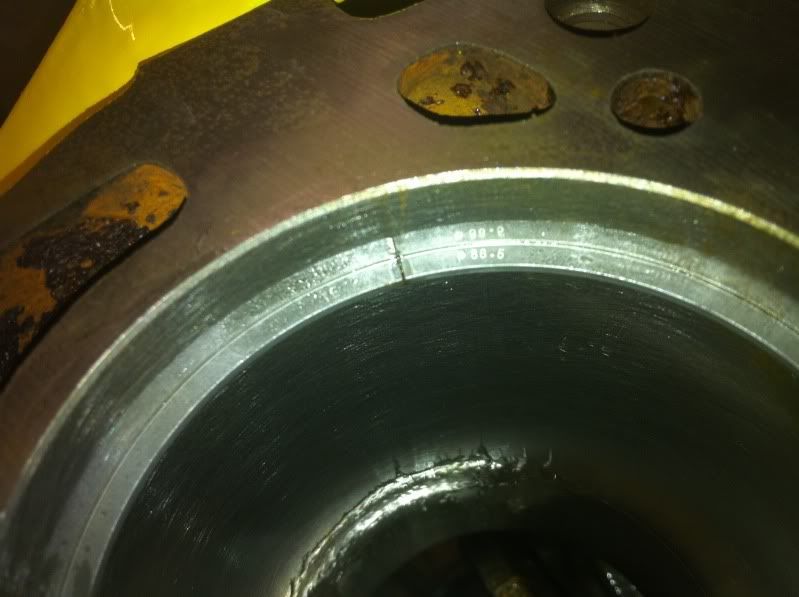
I checked each ring in it's bore & guess whatDunno
The ring gap on every top ring was 0.30mm

The ring gap on every second ring was 0.35mm
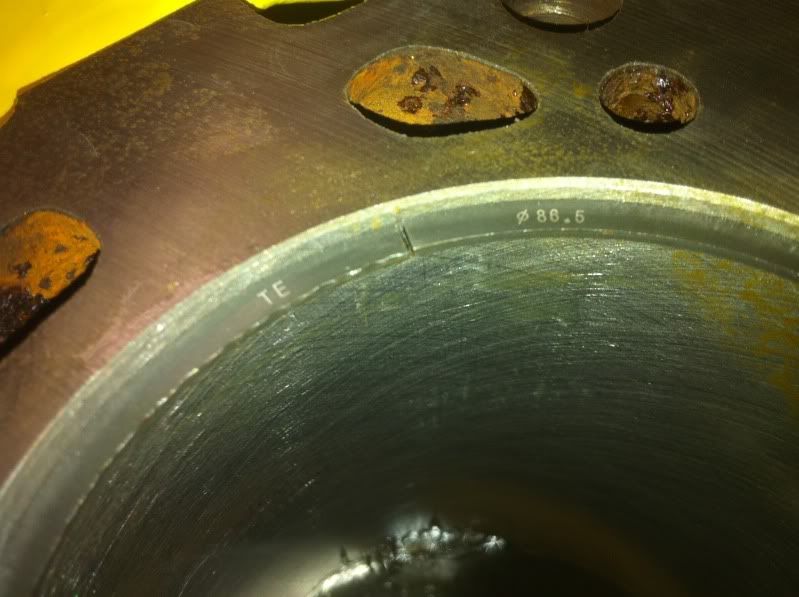

And all the scraper rings were 0.20mm

I decided to leave them all alone, my theory was that with it having freshly bored & honed bores the gaps should grow as everything beds in.

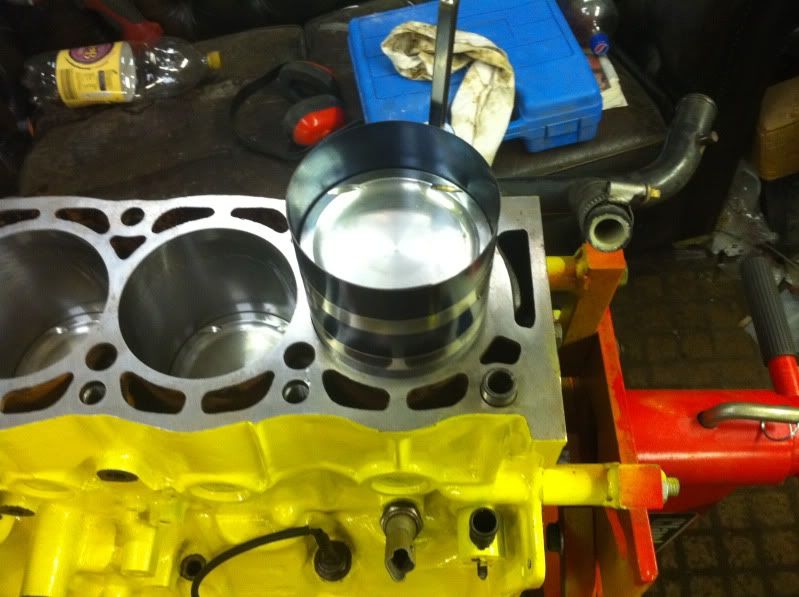
I reassembled the pistons into the block (again)Doh


& I used the correct ARP lube on the bolts, on the threads & under the heads.
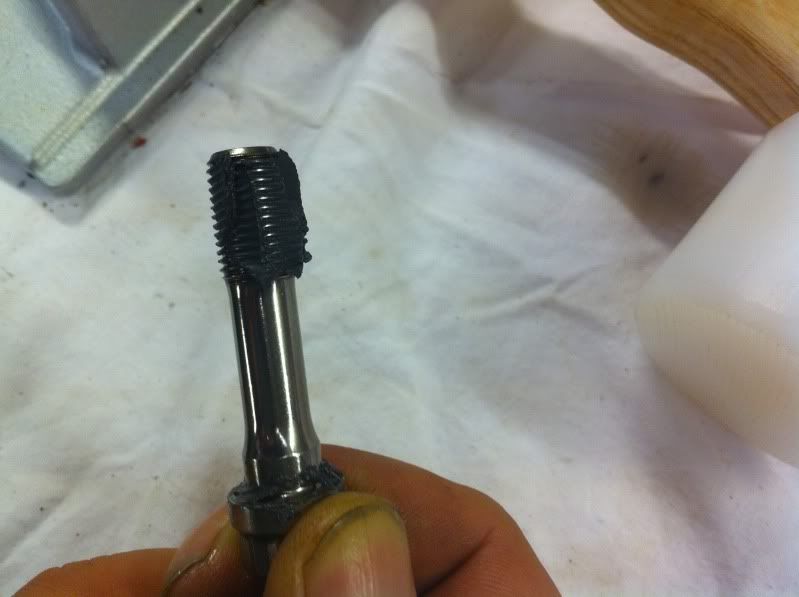

I then torqued all the bolts 45 foot lbs, loosened them off & torqued them to 45 foot lbs again.
I then fitted the splash tray.
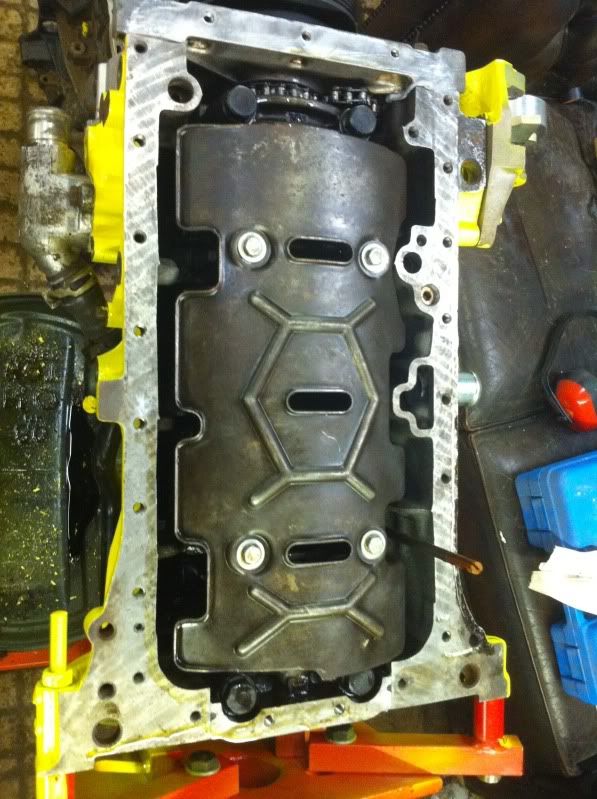

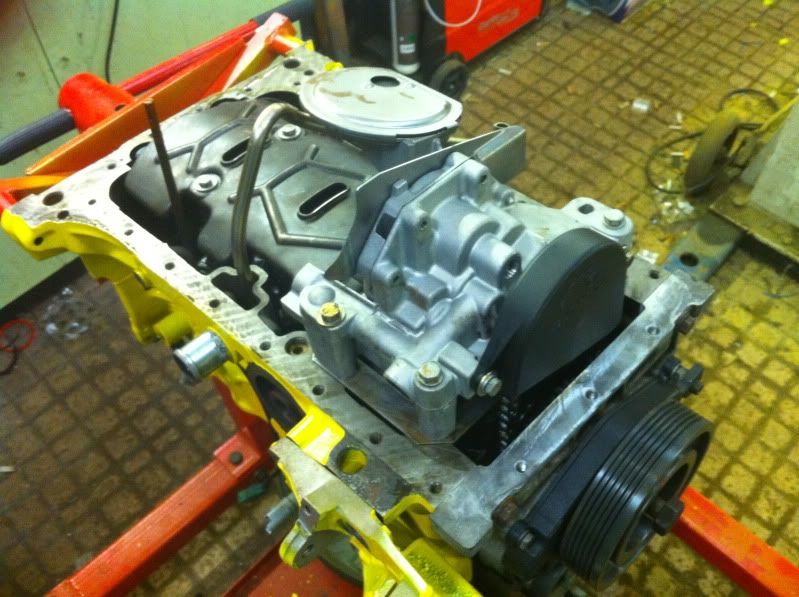
Then I dug out the spacer plate that goes under the oil pump, easy to forget I guess..
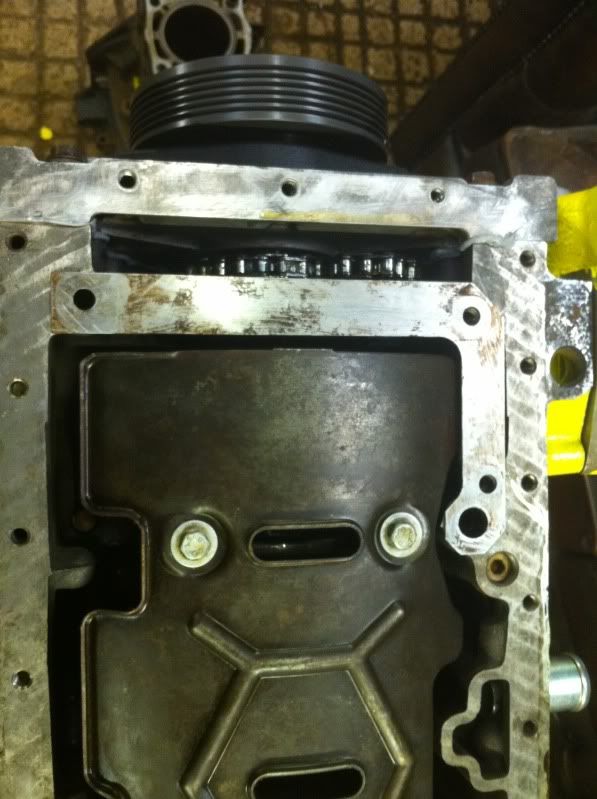

Most people know that I'm a bit of a horder, a couple of years ago Richw had an oil pump for sale that had just been refurbished by Richard Longmans, so as normal I snapped it up in double quick time.
Here it is fitted.
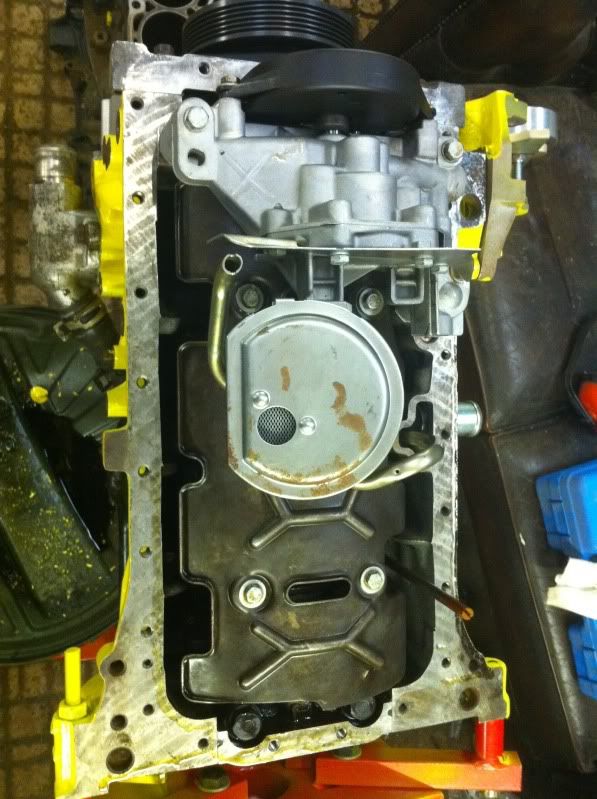
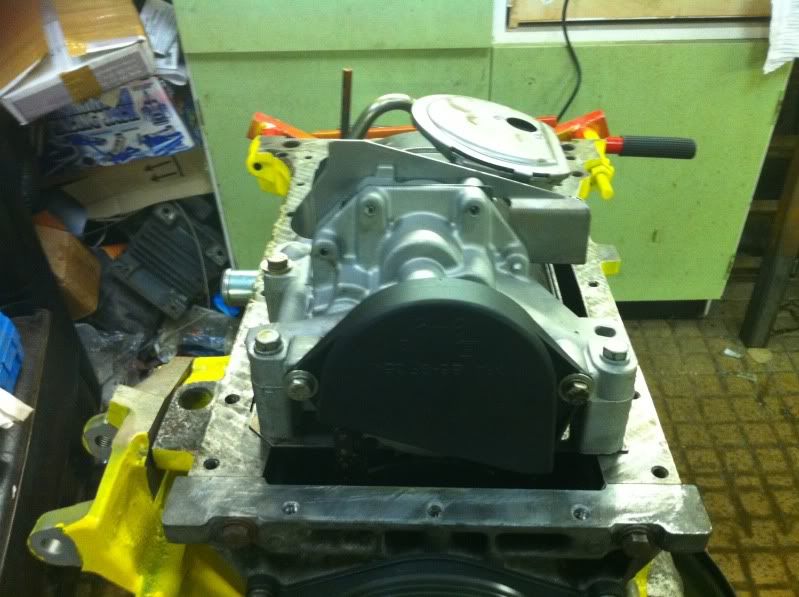

Next I put some beads of Locktite RTV gasket compound onto the face of the sump & fitted it onto the block.
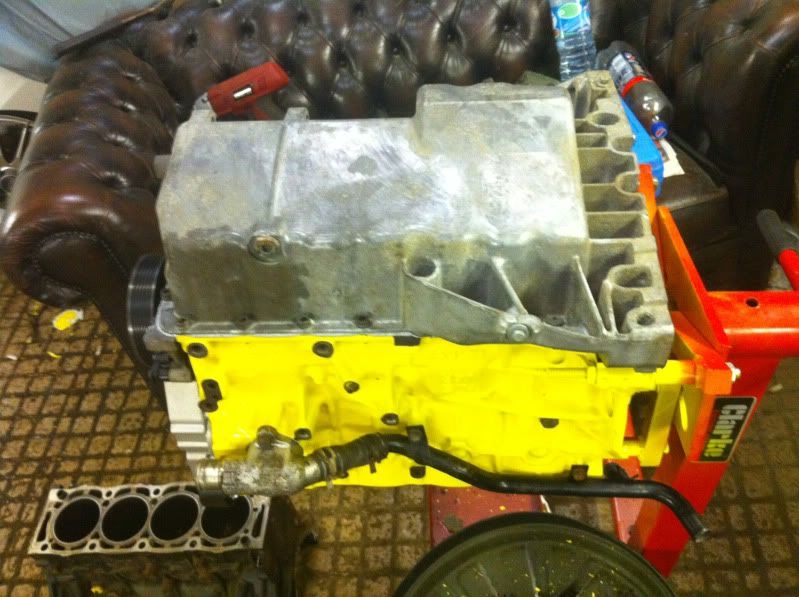
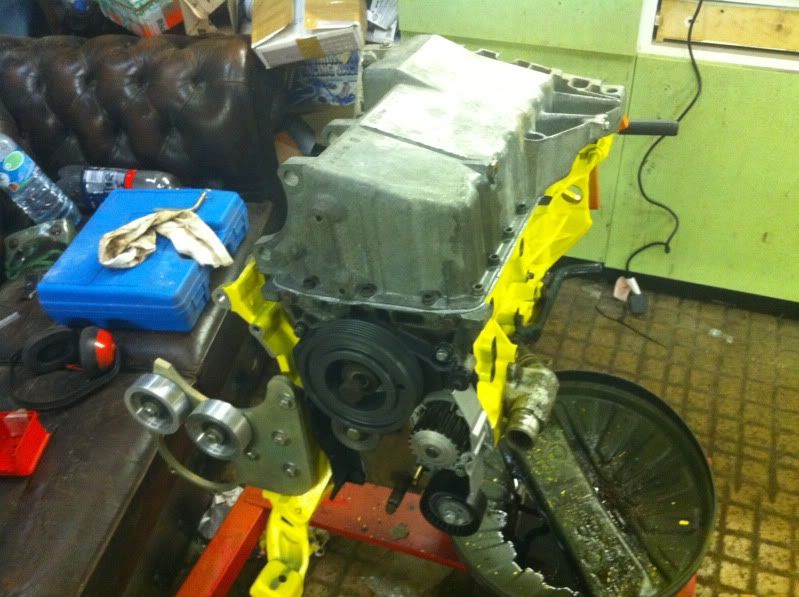

What I'm after now are the 4 alloy top hat bushes that fit onto the sump so that I can mount the power steering pump relocation brackets.
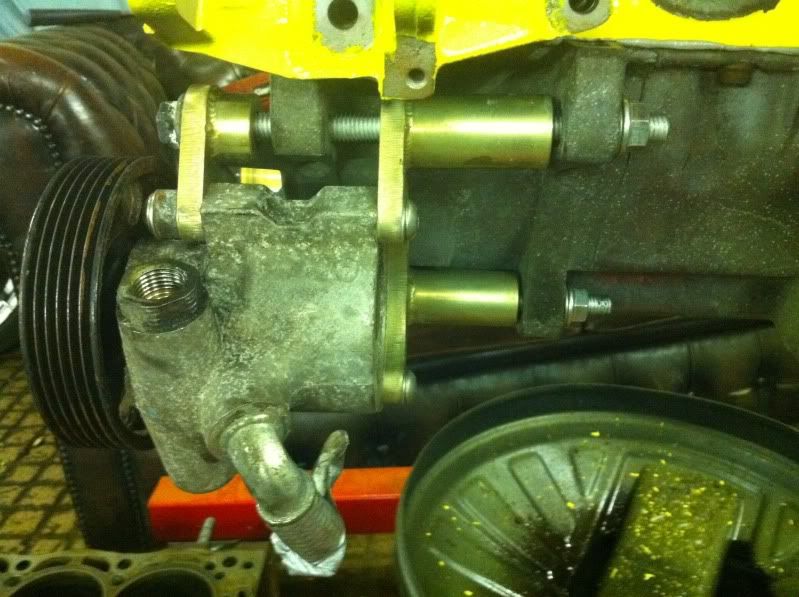

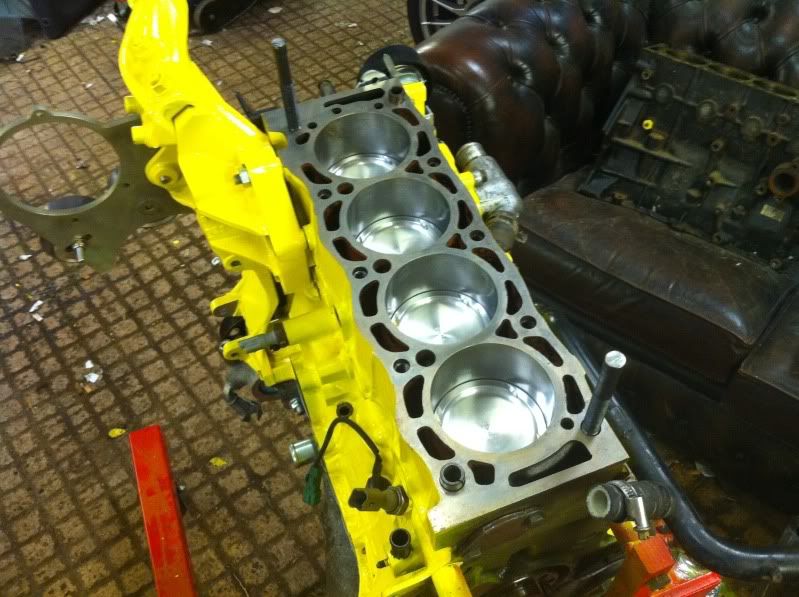
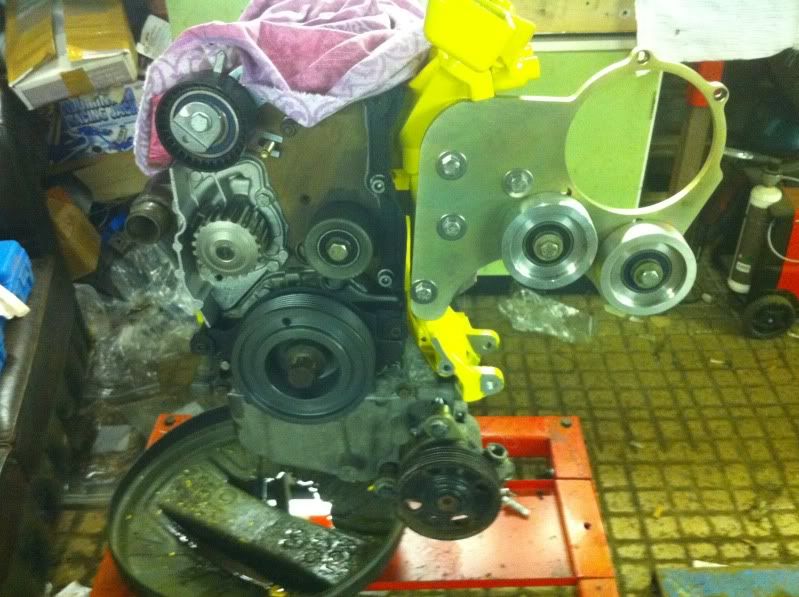
Virtually completed bottom end.

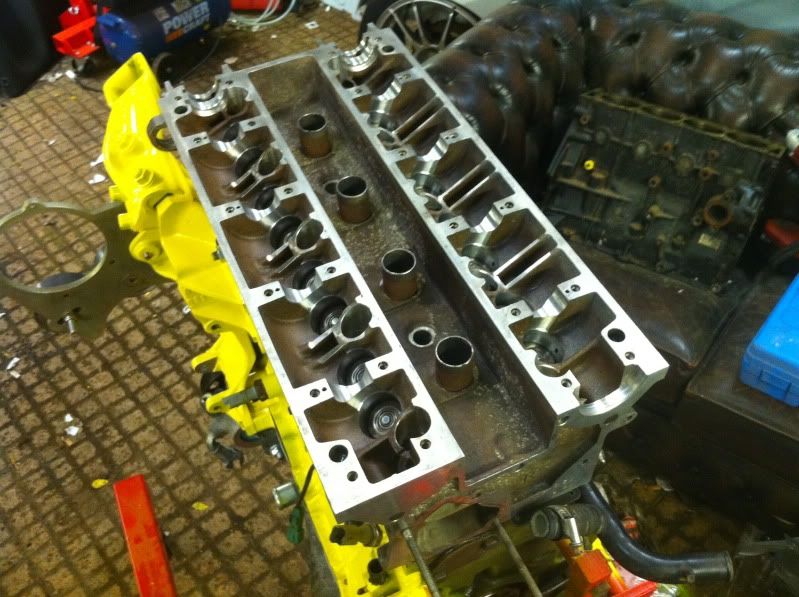
Thought I'd make a start on reassembling the head.
First job was to fit the valve stem oil seals.
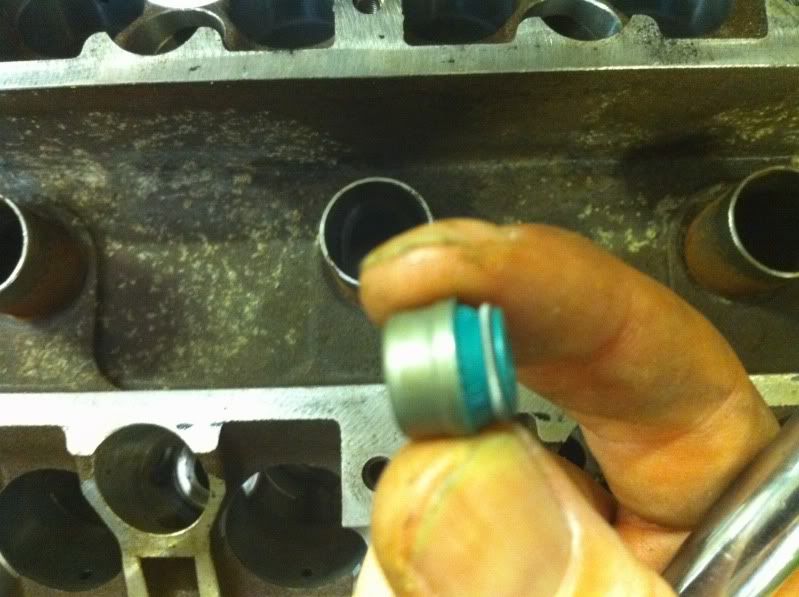

No matter what I tried I just couldn't apply enough pressure with my fingers down the sharp follower bores then I found the perfect size imperial socket.
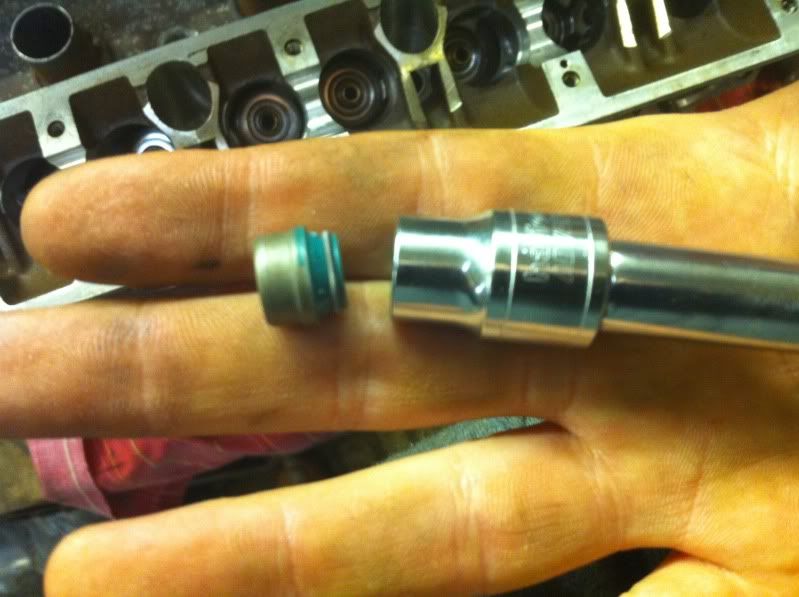
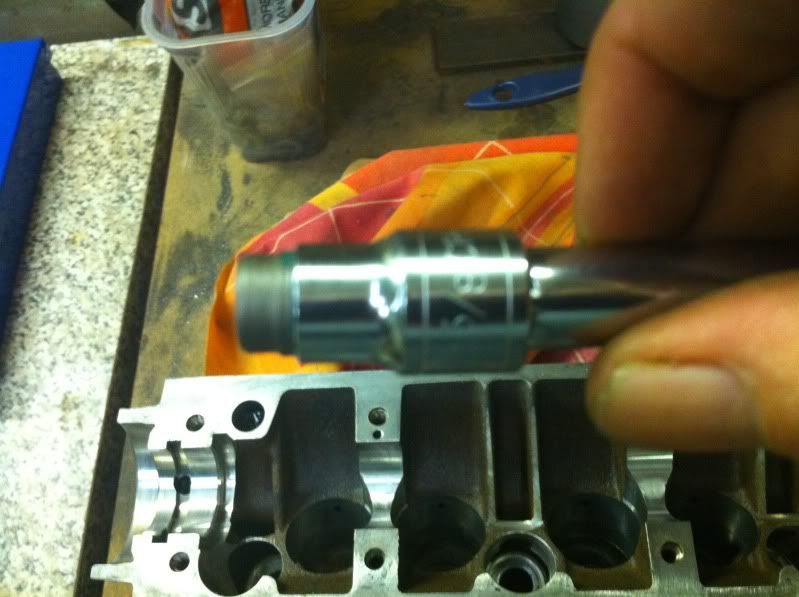

All I had to do was put the socket on the long extention, line things up & give each one a smack or two with a bfh.

All 16 valve stem oil seals fitted in 5 minutes
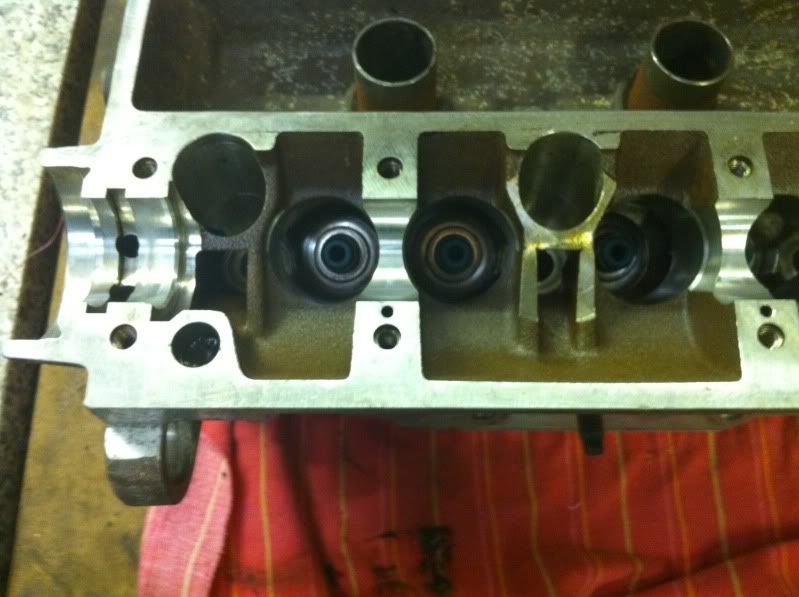

Twin springs in place.
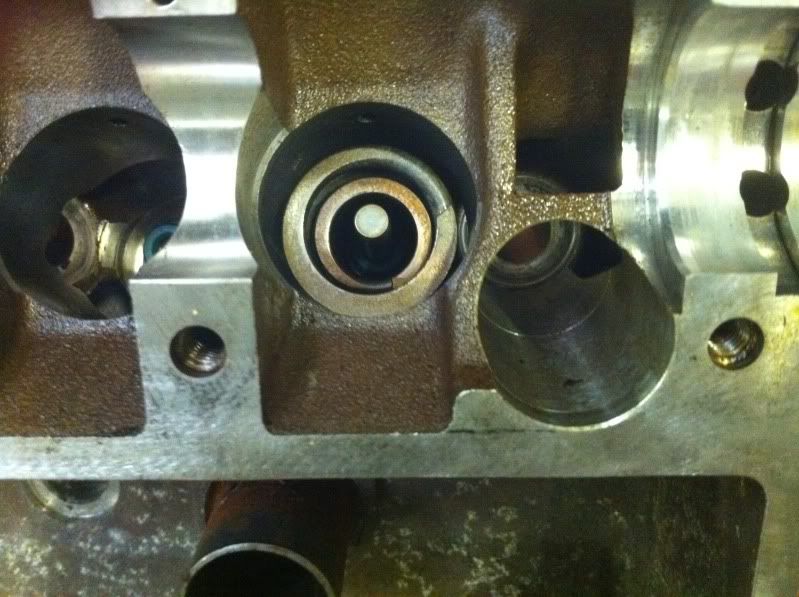

Now when I put the caps on & put the valve spring compressor on it took me about an hour to fit the first pair of collets, even using magnetic screwdrivers & grease.
I eventually got the knack & the other 7 inlets went together a dream.
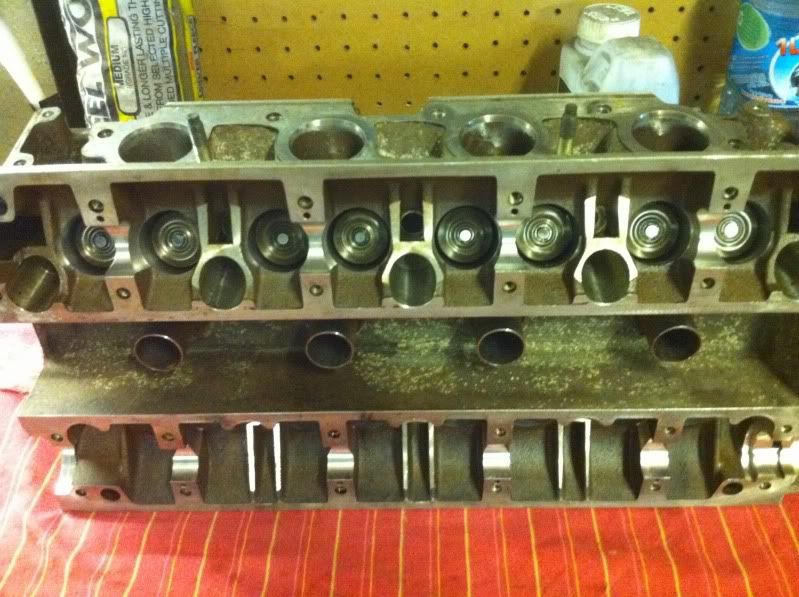

By the time all the inlets were in it was 6.45pm & I had to be home by 7 so I shot off home, the exhausts will have to wait till next weekend.

If anyone has some spare alloy top hat spacers to enable me to fit the power steering relocation bracket onto my sump please drop me a PM, I've had enough of being raped by my local main dealer!!!

Cheers

Cool

________________________________________

Get used to seeing the yellow one !!!MehMehMehMehMeh
Team 330™Cool
Team "no front end or engine"
Team "LIMITED EDITION" I live for the 306 stickerSmug
Team 0-60 in 6.44 & standing qtr in 14.808 @ 94.55mph all with std engineSmug
203bhp Corolla T-Sport daily driver stealthier than Kwai Chang Caine
Posted 18th Oct 2010 at 03:20
daveyboy

aka Jim Davey

Location: Southampton

Registered: 01 Oct 2007

Posts: 8,648

Status: Offline

Post #207
Lovely mate, I need to get motivated on mine again really...

________________________________________

R H Davey Welding Supplies. I sell new and used welding equipment in the Hampshire area. I take on welding jobs in the evenings, ally casting repairs are one of my specialities but I can weld pretty much anything. PM me with your requirements.

Some of my services: (See my for sale threads)
Engine mount/chassis repair
Solid Beam Mounts BACK IN PRODUCTION
Harness bars
Posted 18th Oct 2010 at 20:38
lotek

Seasoned Pro

Location: Berkshire

Registered: 04 Dec 2007

Posts: 6,107

Status: Offline

Post #208
Yes you do ! Leave the bloody jetski alone its pretty much winter FFS!! Laugh my ass off Thumbs up
Posted 18th Oct 2010 at 21:13
daveyboy

aka Jim Davey

Location: Southampton

Registered: 01 Oct 2007

Posts: 8,648

Status: Offline

Post #209
Some muscly black lads from London turned up on a big Jetski but no wetsuits just shorts and life-vests. Maybe they thought it would make them look hard but they gave up and went home after about an hour, they looked like Micheal Jackson by the time they gave up!

________________________________________

R H Davey Welding Supplies. I sell new and used welding equipment in the Hampshire area. I take on welding jobs in the evenings, ally casting repairs are one of my specialities but I can weld pretty much anything. PM me with your requirements.

Some of my services: (See my for sale threads)
Engine mount/chassis repair
Solid Beam Mounts BACK IN PRODUCTION
Harness bars
Posted 18th Oct 2010 at 21:44
midlife

Seasoned Pro

Location: Colne, Lancashire

Registered: 13 Mar 2006

Posts: 7,544

Status: Offline

Post #210
Better late than never, my guestimate wasn't too far off so I'm a happy chappy!

Hello Mr Platt,


Recommended ringendgap on the top ring is 0,35 to 0,4 and 0,35 to 0,60mm on the second ring.

These figures vary a lot because they depend on so many surrounding specs. The final decision is always with the engine-builder.


Best regards,

Antonio Pirocco

Wφssner GmbH

Cool

________________________________________

Get used to seeing the yellow one !!!MehMehMehMehMeh
Team 330™Cool
Team "no front end or engine"
Team "LIMITED EDITION" I live for the 306 stickerSmug
Team 0-60 in 6.44 & standing qtr in 14.808 @ 94.55mph all with std engineSmug
203bhp Corolla T-Sport daily driver stealthier than Kwai Chang Caine
Posted 20th Oct 2010 at 06:52
midlife

Seasoned Pro

Location: Colne, Lancashire

Registered: 13 Mar 2006

Posts: 7,544

Status: Offline

Post #211
Update time....
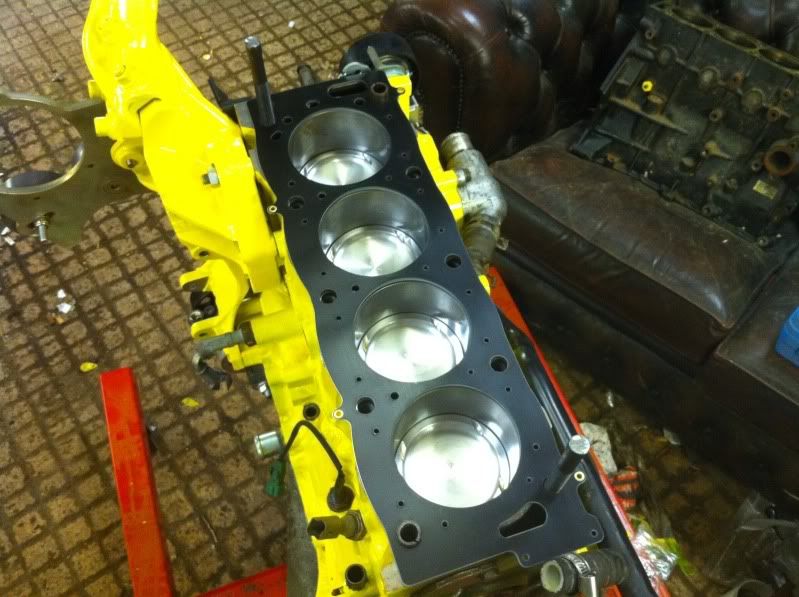
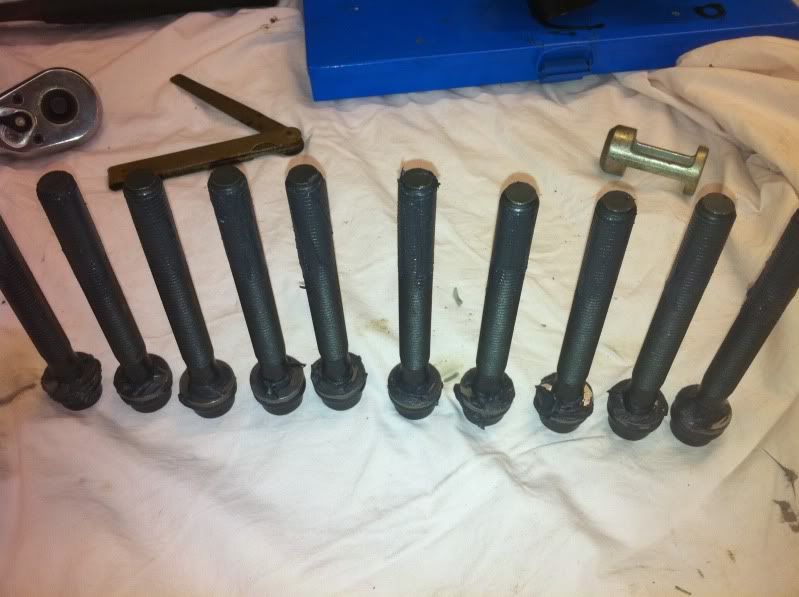
Cut the heads off two old head bolts to give me better alignment.


Richw special uprated head gasket on.


Head on.


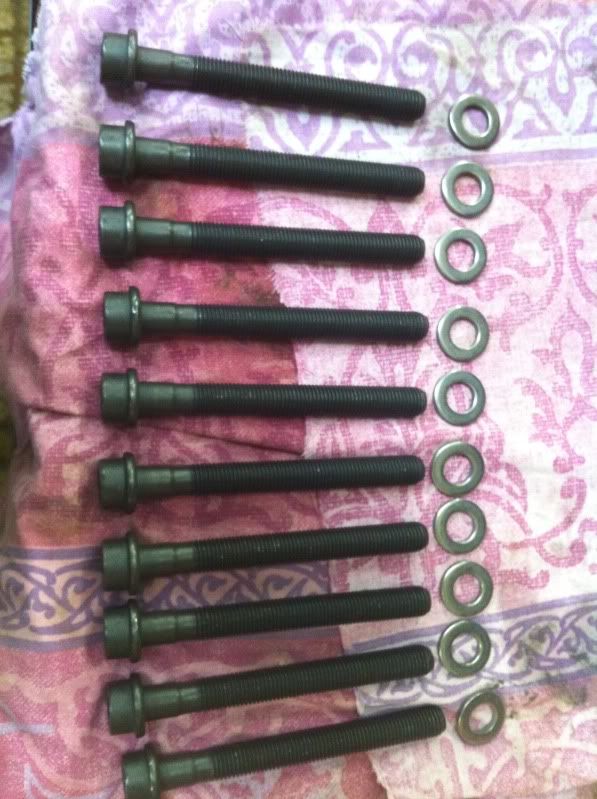
Nice set of new head bolts & washers


ARP lube applied to threads & both sides of the washers


Problem No1...
The Halfrauds socket set I have has the correct size star pin socket thingy for the head bolts but is only 3/8" drive, my torque wrench is ½" drive. Whoever decided where the crossover point should be between the two drive sizes should be shot IMHO!
So I couldn't torque up the head boltsDoh
Only thing left that I could do was fit the cams.....

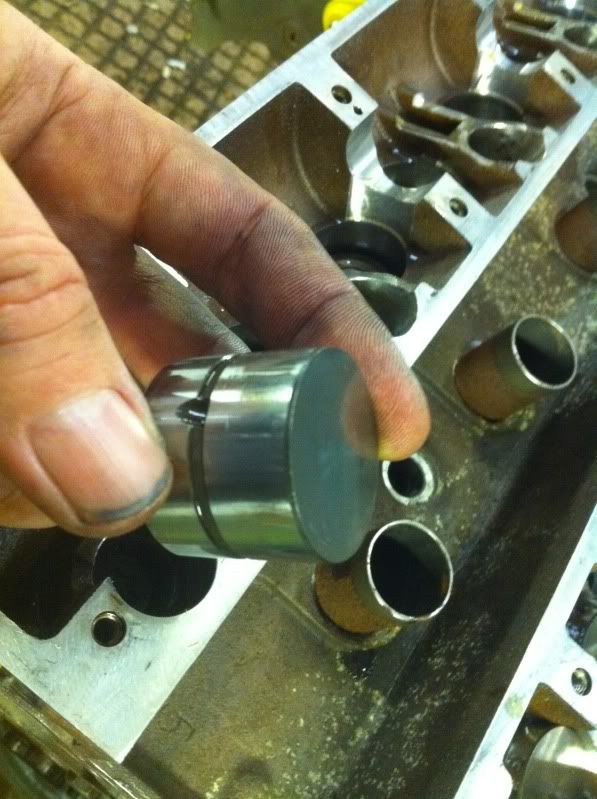
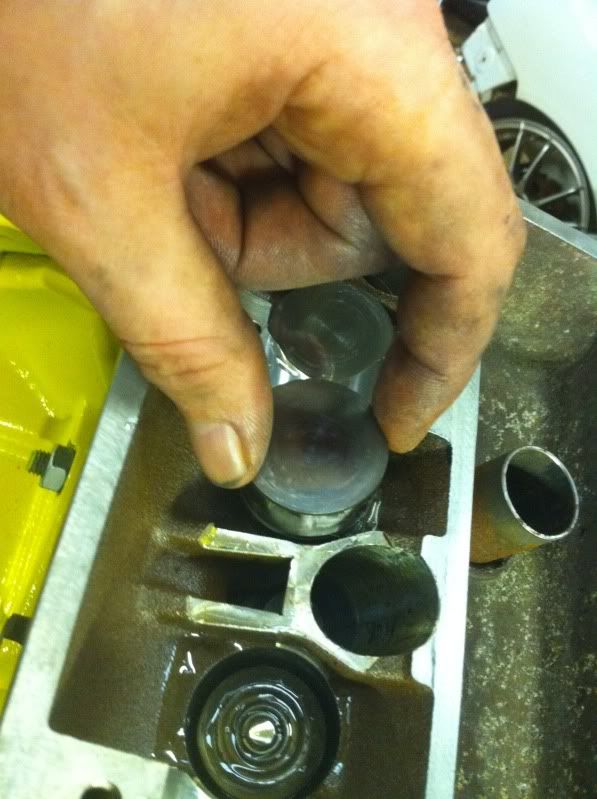
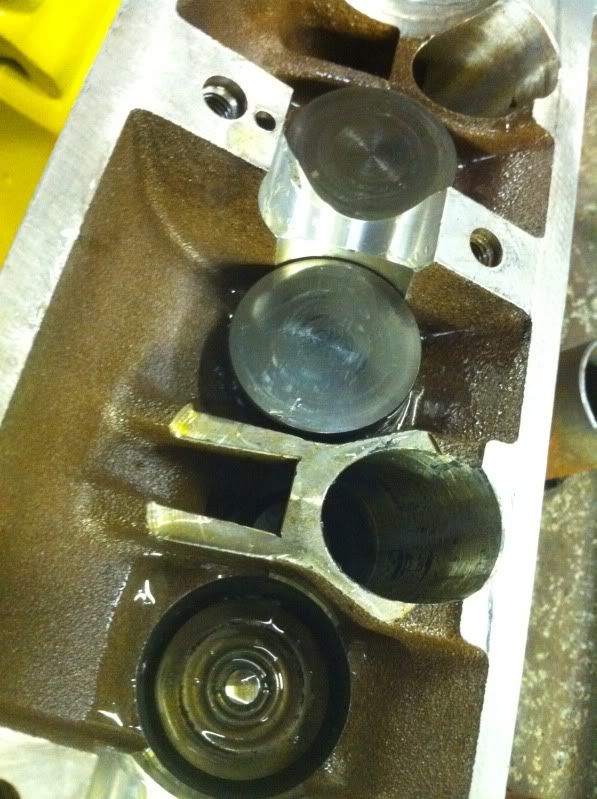
Cam followers first


Plenty of assembly lube then slide them in


You have got to be careful to get them at the exact angle or they won't go in, get it right & they slide in nicely with very little clearance.

I don't know why bit I missed taking a few pics here?
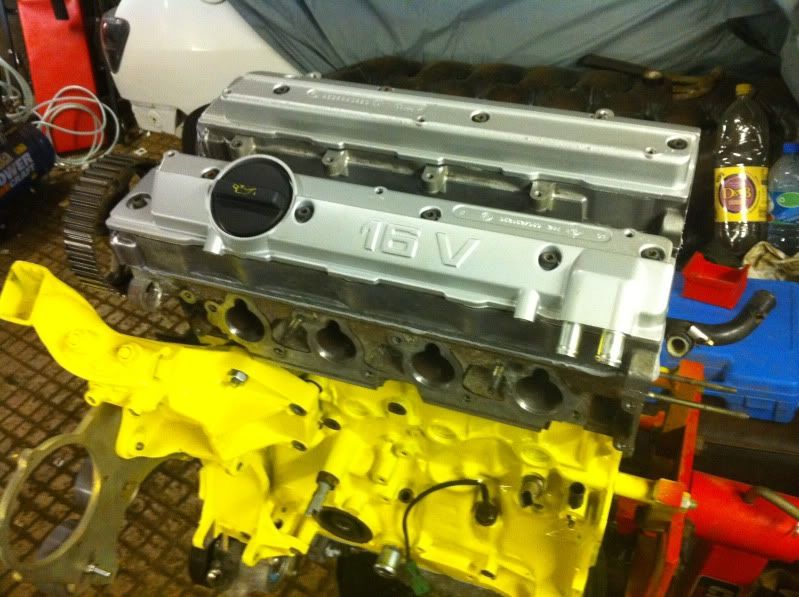
I thoroughly cleaned both cam carriers taking extreme care with the head to carrier face & applied Locktite rtv sealant in a nice even bead approx 4mm diameter all the way round the carrier face, I then put plenty of assembly lube on the head cam journals & layed the cam in place, more lube all along the cam then placed the carrier over the top. The carrier is located by two dowels & needed a little tap to get it to locate, I have a very lightweight nylon mallet that did the job nicely.
Carrier bolts in then guess what, the allen key drive in my socket set is too small to fit my torque wrench... FFS...

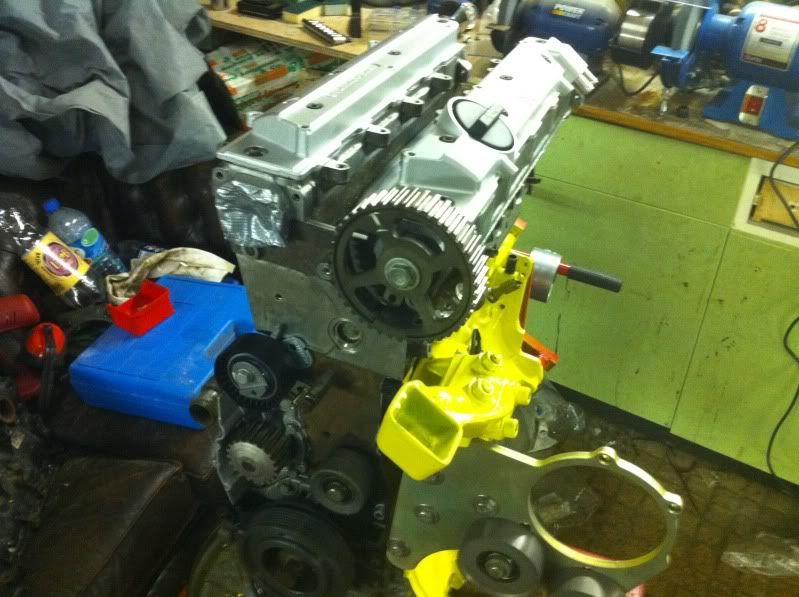
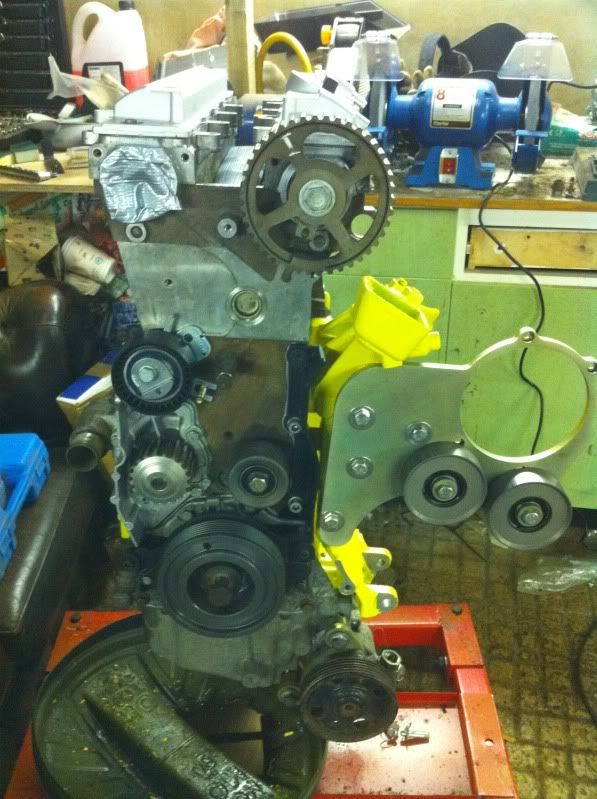
I need some new camshaft oil seals so I can't fit the cam pulley properly & time up the cam, that means I can't fit the second cam either for fear of touching valves. What a weekend!!!!
I've got a mate using the ramp atm so to keep shit out of the engine I loosely fitted the other cam carrier & rocker covers.
This is where I'm upto now, awaiting parts & tools....


Roll on next weekend!

Cool

________________________________________

Get used to seeing the yellow one !!!MehMehMehMehMeh
Team 330™Cool
Team "no front end or engine"
Team "LIMITED EDITION" I live for the 306 stickerSmug
Team 0-60 in 6.44 & standing qtr in 14.808 @ 94.55mph all with std engineSmug
203bhp Corolla T-Sport daily driver stealthier than Kwai Chang Caine
Posted 24th Oct 2010 at 17:52
rich_w

Seasoned Pro

Location: Havant, Hampshire

Registered: 29 Jul 2004

Posts: 5,412

Status: Offline

Post #212
I take it you got the pullies alright mate?

Smile

________________________________________

Contact Details:

rich@lynxpowerengineering.co.uk
07732 822546

Posted 24th Oct 2010 at 23:49
midlife

Seasoned Pro

Location: Colne, Lancashire

Registered: 13 Mar 2006

Posts: 7,544

Status: Offline

Post #213
Received & fitted on Saturday morning, thanks Rich, top customer serviceThumbs up

Cool

________________________________________

Get used to seeing the yellow one !!!MehMehMehMehMeh
Team 330™Cool
Team "no front end or engine"
Team "LIMITED EDITION" I live for the 306 stickerSmug
Team 0-60 in 6.44 & standing qtr in 14.808 @ 94.55mph all with std engineSmug
203bhp Corolla T-Sport daily driver stealthier than Kwai Chang Caine
Posted 25th Oct 2010 at 01:29
midlife

Seasoned Pro

Location: Colne, Lancashire

Registered: 13 Mar 2006

Posts: 7,544

Status: Offline

Post #214
The main stealer let me down with the bloody camshaft oil seals, he now says they will be here on Tuesday!
I want to Halfrauds yesterday & bought a ½" drive T55 torx drive to torque the head up, while there I also got a ½" to 3/8 & a 3/8 to Ό adaptors.
When I came to start torqueing the head bolts the new torx drive was too big a diameter to fit into the head & locate in the head bolts, FFS!!!!!
Bloody good job I got the adaptors! I managed to use the 3/8" drive T55 out of my socket set with the ½" to 3/8" adaptor. Although I was worried the adaptor would shear off all worked out fine.
The torque settings I used were
Stage 1 35nm
Stage 2 70nm
Stage 3 +160 degrees

I was sweating my nads off by the time I finished, it's certainly hard work putting the 160 degrees on with the engine on the engine stand with wheels on the bottom!!!

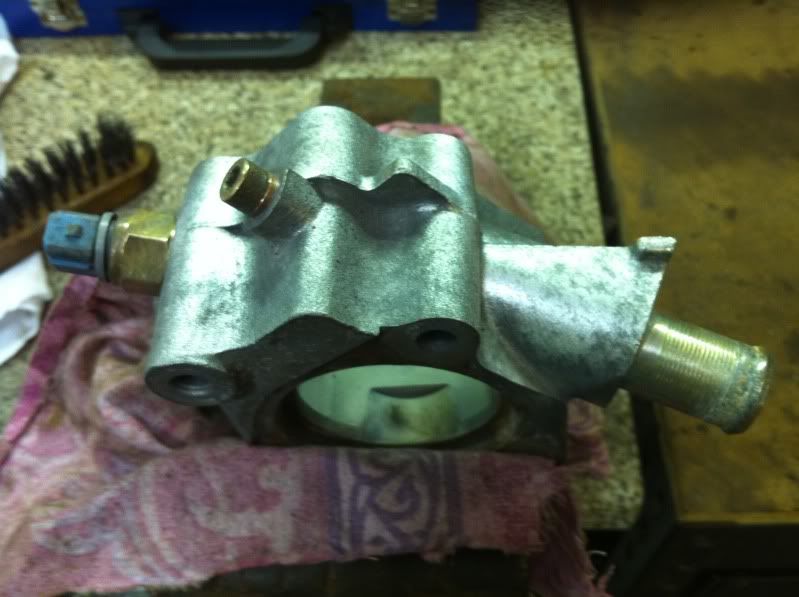
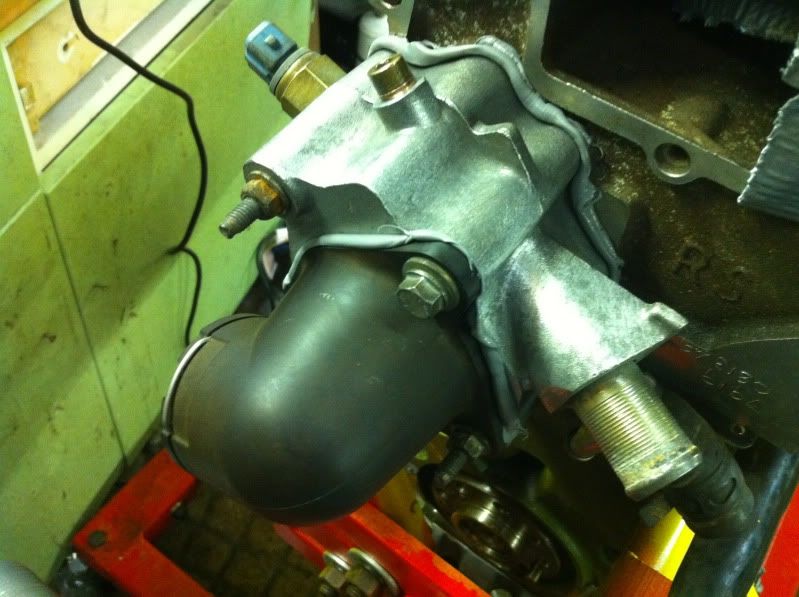
I then got stuck into cleaning up the thermostat housing with a wire brush..


I may have got carried away with the RTV sealant but if this bugger leaks I'll show my arse on the town hall steps!


Once it sets I'll trim the excess off!

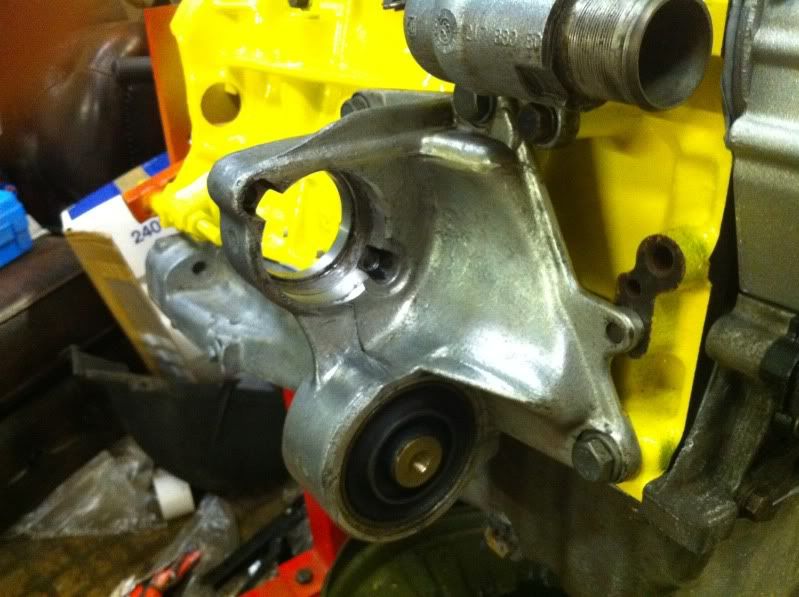
When I was taking the engine out I couldn't get the o/s drive shaft out of the support on the back of the block so I split the drive shaft & cable tied a rubber glove over the end to keep the shit out.
Over the last few weeks I've been spraying plenty of WD40 on the bearing in the support. Surprisingly there is nowhere really on the support where you can hold it in a vice so I gripped the rubber engine mount bush & holding the driveshaft pushed it up until things went solid & then hit the splined end of the shaft with a bfh, I was quite gentle at first but it didn't take long before I was properly smacking it. After about 5 mins of gentle persuasion it started to move slightly, 3 more "taps" & it was out.
One of the few things I haven't got it a press, so to get the bottom bush out I put a hacksaw blade through one of the voids & cut the middle out, I then carefully cut through the outer steel band & knocked it out with a pin punch.
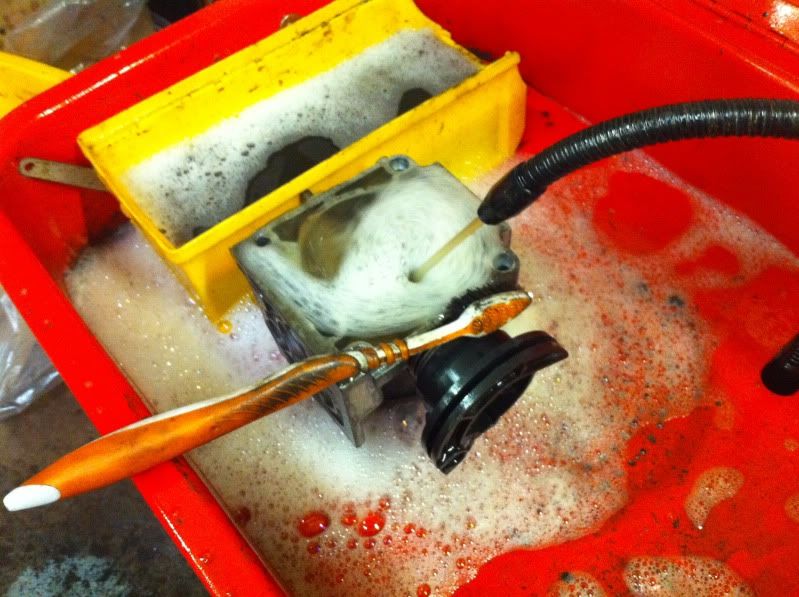
I then set about cleaning all the crud & oil off the support. The parts washer came into it's own with a toothbrush & then a wire brush. I then realised what a p*ss poor casting it was with flash all over the place, me being me I set to with the file & tidied it up.
Next was to try & fit the Baker BM bush, no press remember so I gave it a "little tap" with the BFH to get it started & then I started squeezing it either side in the vice trying to keep it square a mm at a time, then when about half way in it started to keep itself square & with the help of a 4 foot long piece of pipe on the vice handle it slid in nicely. I then bolted the support onto the block.

Back to the garage tomorrow.

Edit, spent Sunday in the garage then had to take youngest daughter to hospital, she's been admitted, I was there till 4am, update on car to follow tonight when I get chance.
Cool

________________________________________

Get used to seeing the yellow one !!!MehMehMehMehMeh
Team 330™Cool
Team "no front end or engine"
Team "LIMITED EDITION" I live for the 306 stickerSmug
Team 0-60 in 6.44 & standing qtr in 14.808 @ 94.55mph all with std engineSmug
203bhp Corolla T-Sport daily driver stealthier than Kwai Chang Caine
Posted 1st Nov 2010 at 16:55
n.g.k

Seasoned Pro

Location: Peoples Republic Of Cork

Registered: 03 Feb 2008

Posts: 6,200

Status: Offline

Post #215
She's coming along nicely chap. Well wear! Thumbs up

________________________________________

Inside you are face!

Tune Of The Month
Posted 1st Nov 2010 at 08:22
midlife

Seasoned Pro

Location: Colne, Lancashire

Registered: 13 Mar 2006

Posts: 7,544

Status: Offline

Post #216
Sunday update...
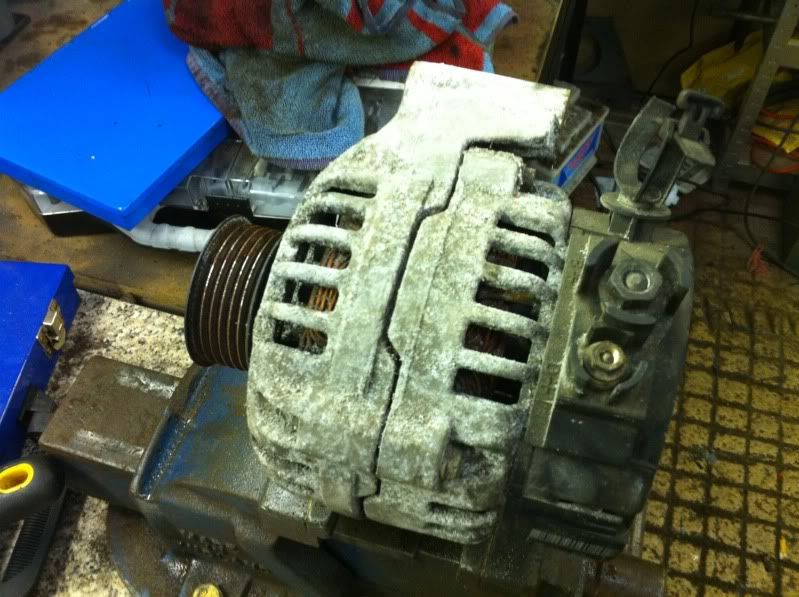
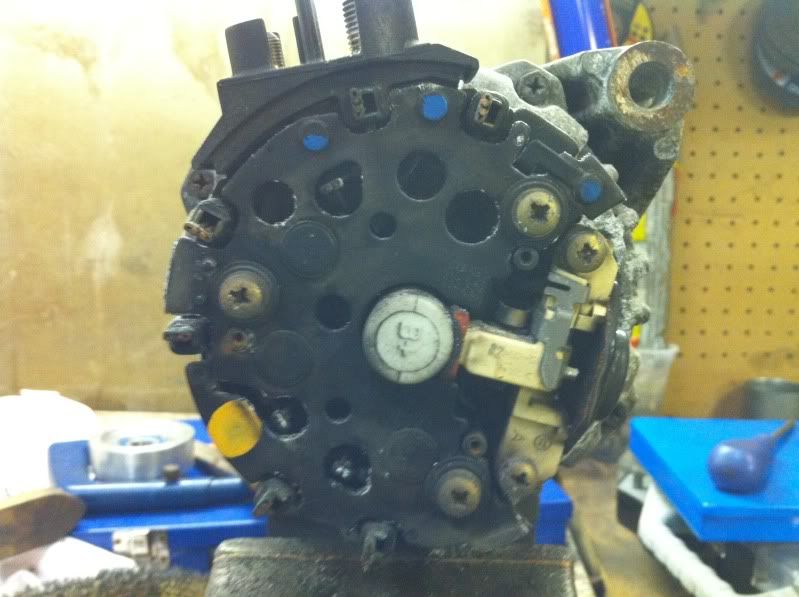
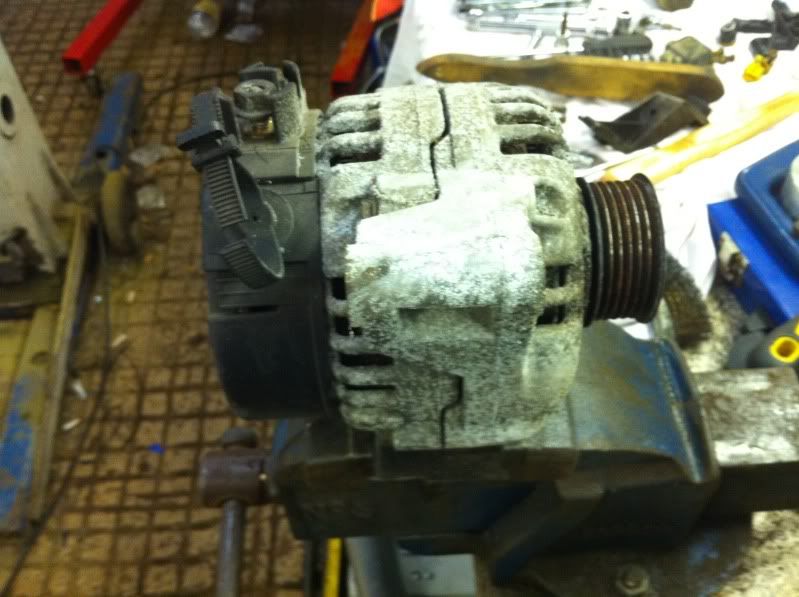
I decided that I don't want to bolt any manky looking ancillaries onto my shiney new engine, thought I'd start with this p*ss poor example of an alternator.


I started by taking the plastic cover off the end.


First I removed the 2 screws to remove the brushes, the cream coloured bit.
I then removed the other 3 screws.
Then I removed the 4 bolts that hold the two halves of the alloy casing together.
Would it come apart?
No!!!!
I started looking more closely & I spotted 3 small screws under the pulley, so off came the pulley & after a lot of messing about I managed to get the screws out.
Would it come apart?
No!!!!
FFS!!!!!!!!!!!!!!
For the life of me I just couldn't find what was still holding it together, 10 cigs later I decided to bin the idea of getting the alloy casing sand blasted, wire brushing will just have to do!!!!
I cleaned up all the bits the best I could & reassembled it all.

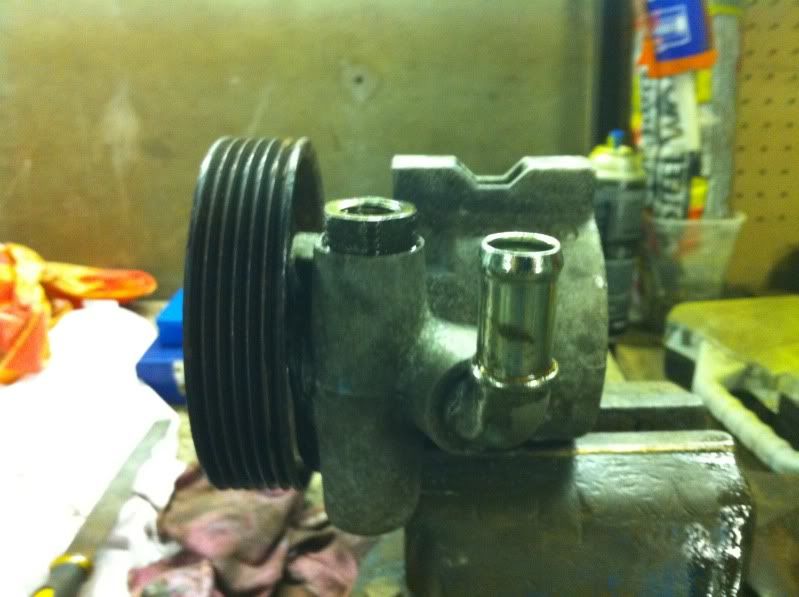
I then started work on the power steering pump, first job was to rotate th fluid input elbow so that it points upwards when mounted on the new bracket.
I held the pump in the vice, got a long series socket (big enough to fit over the pipe) with an extention fitted to give me enough leverage & I started to put more & more weight on it until it started to move. The trouble was it wasn't actually moving it was bending! Bugger!!!!
5 cigs later I decided to dig out a heat gun normally used for stripping paint off skirting boards & I started to apply heat to the pump around where the elbow is (not directly on the elbow) until slight smoke started to come out of the pipe. This time when I started to apply pressure there was a crack & it started to move, 10 seconds later it was rotated to the correct angle.
Tadah!!

I then set to with the wire brush to clean it up.

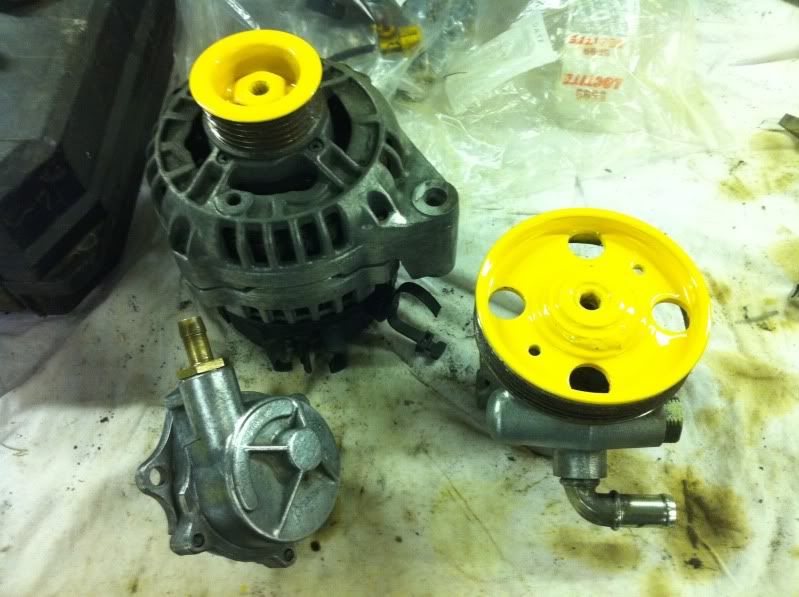
Next came the vacuum pump, this was far simpler & just needed a good going over with the wire brush.

I just couldn't resist carrying on with the under bonnet theme, here they are fully tarted up...


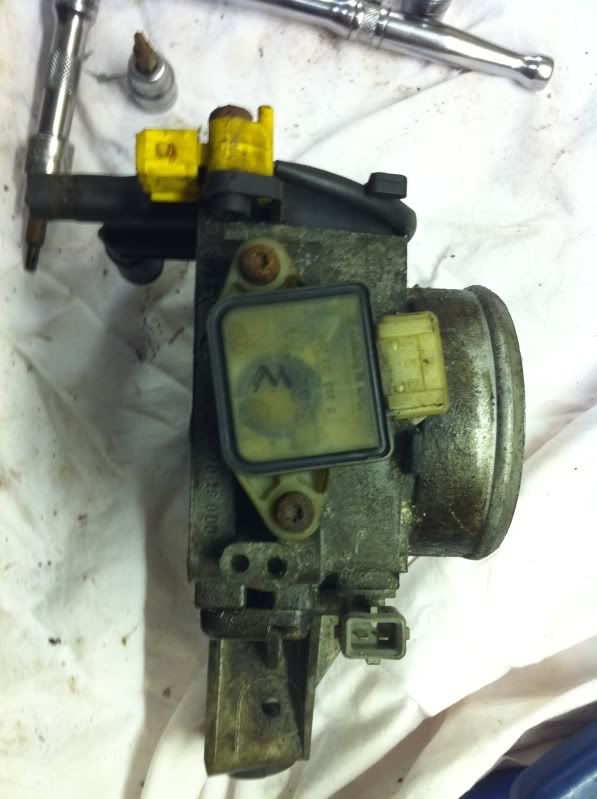
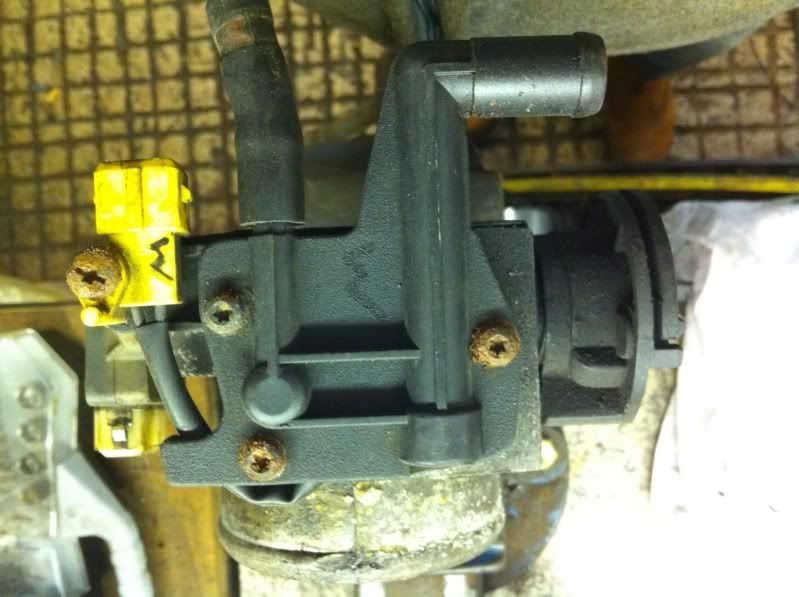
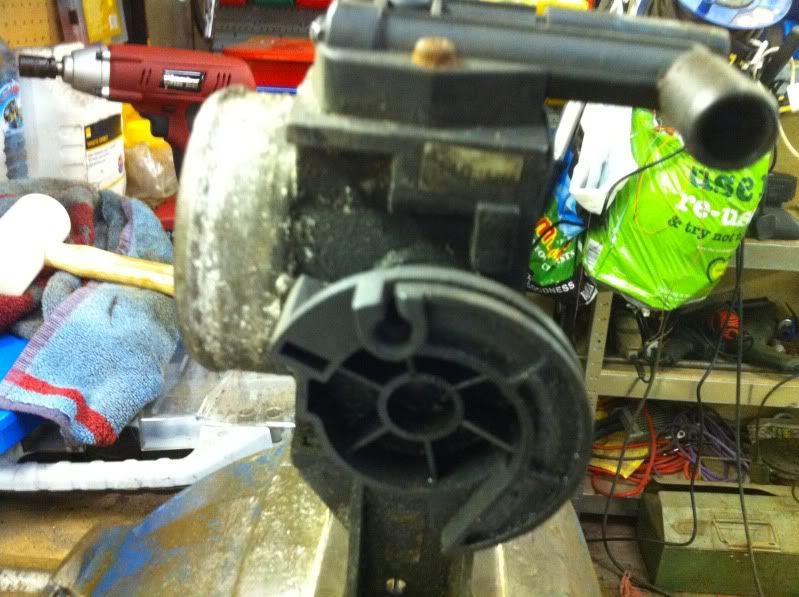
Next on the agenda was the throttle body.


Shit up was an understatement!
I stripped everything off it I could & chucked it in the parts washer.


Looking at it the casting is too intricate to clean up with the wire brush, has anyone ever removed the 2 screws that hold the butterfly in place to get the throttle spindle out?
I think I need to remove them so that I can get it sand blasted...

At this point I got a phone call from the wife telling me I had to get to the hospital, my youngest daughter (20) has bad tonsillitis, think it's actually called QuinceyDunno

More next weekend!

________________________________________

Get used to seeing the yellow one !!!MehMehMehMehMeh
Team 330™Cool
Team "no front end or engine"
Team "LIMITED EDITION" I live for the 306 stickerSmug
Team 0-60 in 6.44 & standing qtr in 14.808 @ 94.55mph all with std engineSmug
203bhp Corolla T-Sport daily driver stealthier than Kwai Chang Caine
Posted 2nd Nov 2010 at 03:41
mabgti

NV motors

Location: Bham tunnel @7400rpm

Registered: 28 Aug 2003

Posts: 9,127

Status: Offline

Post #217
its tricky getting the spindle out without damaging the screws wayne.. and remember the spring is in tension too..

________________________________________

Team Supercharged Gti-6

NV Motorsport
Automotive Performance Tuning
0121 448 7515
ECU Remapping/ DPF removal
VAG/BMW Diag and Option Coding
Peugeot Planet ECU coding/transponder programming etc
www.nvmotorsport.com
Facebook Page
Project S6
Posted 2nd Nov 2010 at 04:00
midlife

Seasoned Pro

Location: Colne, Lancashire

Registered: 13 Mar 2006

Posts: 7,544

Status: Offline

Post #218
mabgti wrote:
its tricky getting the spindle out without damaging the screws wayne.. and remember the spring is in tension too..


Yeh it looks like the threaded ends have been peened over where they poke through the other side of the spindle, I may just have to tape it up before it's blastedDunno

Cool

________________________________________

Get used to seeing the yellow one !!!MehMehMehMehMeh
Team 330™Cool
Team "no front end or engine"
Team "LIMITED EDITION" I live for the 306 stickerSmug
Team 0-60 in 6.44 & standing qtr in 14.808 @ 94.55mph all with std engineSmug
203bhp Corolla T-Sport daily driver stealthier than Kwai Chang Caine
Posted 2nd Nov 2010 at 04:10
roland rat

Yeeeah Rat fans!

Location: Swansea

Registered: 29 Nov 2006

Posts: 22,284

Status: Offline

Post #219
Looking good but that sump is no where near shiny enough magpie man!
Posted 2nd Nov 2010 at 04:32
midlife

Seasoned Pro

Location: Colne, Lancashire

Registered: 13 Mar 2006

Posts: 7,544

Status: Offline

Post #220
roland rat wrote:
Looking good but that sump is no where near shiny enough magpie man!


Ohhh don't worry, it will be getting the wire brush treatment!

Cool

________________________________________

Get used to seeing the yellow one !!!MehMehMehMehMeh
Team 330™Cool
Team "no front end or engine"
Team "LIMITED EDITION" I live for the 306 stickerSmug
Team 0-60 in 6.44 & standing qtr in 14.808 @ 94.55mph all with std engineSmug
203bhp Corolla T-Sport daily driver stealthier than Kwai Chang Caine
Posted 2nd Nov 2010 at 04:35
coskev

Seasoned Pro

Location: Oswestry

Registered: 01 Nov 2009

Posts: 3,132

Status: Offline

Post #221
Looking goodCool

Re. the over use of RTV though,you realise you will have the same excess over on the inside of thermo housing?
If it comes a drift it will block something up,ie radSad
Hope you did not use as much on sump?
As the excess will come off and block up your oil pick up strainerCrazy

________________________________________

Red GTB1756 powered Fabia VRS daily driver,LBSC Gti6 eater........

Mac1 ZR R1 kit car build in progress.
Posted 2nd Nov 2010 at 14:18
cwspellowe

Seasoned Pro

Location: Calderbank

Registered: 19 Jul 2009

Posts: 6,496

Status: Offline

Post #222
Hmm i've just decided my engine bay isn't clean enough now damn you!

I need an ultrasonic cleaner, think my dad has an old one at home for cleaning jewellery Hmm

________________________________________

Bye bye Sundance Kid Sad
Posted 2nd Nov 2010 at 18:28
ben306

Seasoned Pro

Location: North West

Registered: 17 Jan 2006

Posts: 2,942

Status: Offline

Post #223
Loving this. Cant wait to see it back out on the road.

Defo inspiring me to go the whole way with mine and give it the full once over!

________________________________________

My 306 Rallye Project Thread

Few recent Youtube track videos, more on my channel
Pair of Rallye's doing a few laps of Anglesey


Lap of Anglesey Coastal

3 sisters circuit

Few laps at Blyton
Posted 2nd Nov 2010 at 18:41
midlife

Seasoned Pro

Location: Colne, Lancashire

Registered: 13 Mar 2006

Posts: 7,544

Status: Offline

Post #224
Cheers lads, don't worry over the rtv sealer, I put the beads near the outside edge. Funny thing is that I must have spent hours scraping the old rtv off, I can't ever see it coming lose on it's own....

Anyhoo, Santa has been today!
From the mainstealer I got...
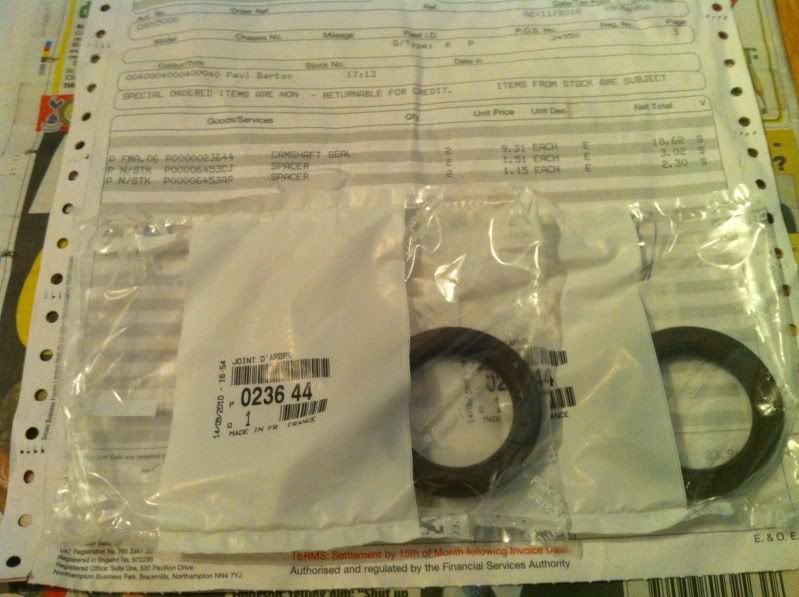
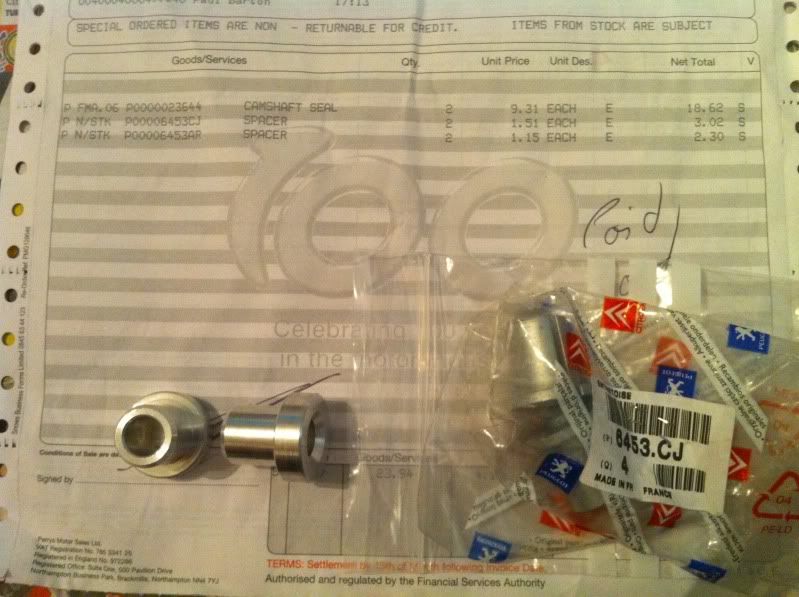
2 x camshaft oil seals part No 023644 £9.31 each + vat


Next the bushes required on a Rallye sump to relocate the power steering pump.


2 x part number 06453AR (alloy) £1.15 each + vat
2 x part number 06453CJ (steel) £1.51 each + vat


And a package arrived from Motorsport Tools
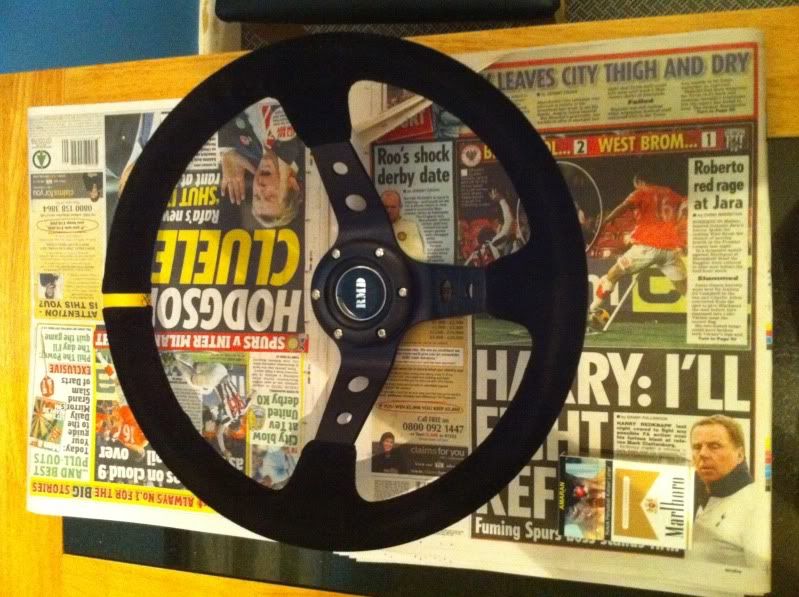
A 350mm 75mm dished steering wheel, really nice quality feel for just over £50


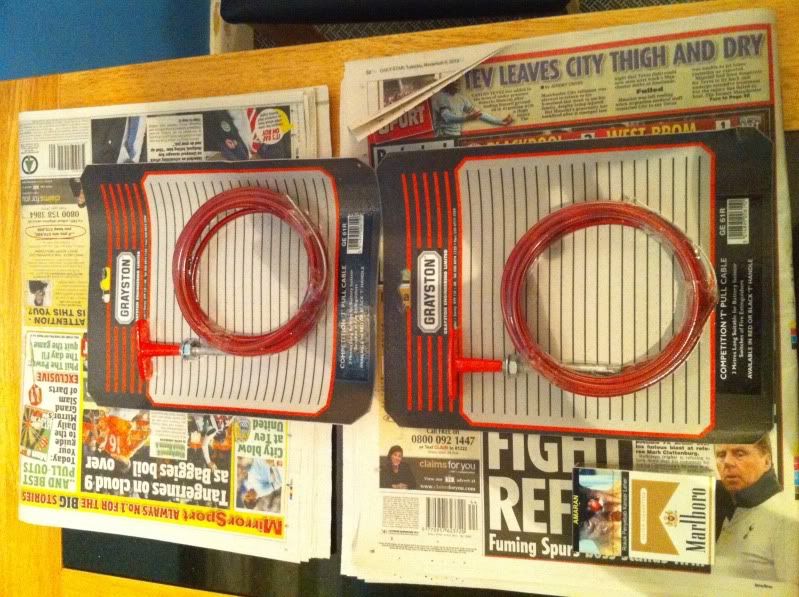
Two pulls, one for electric cutoff & one for extinguisher.


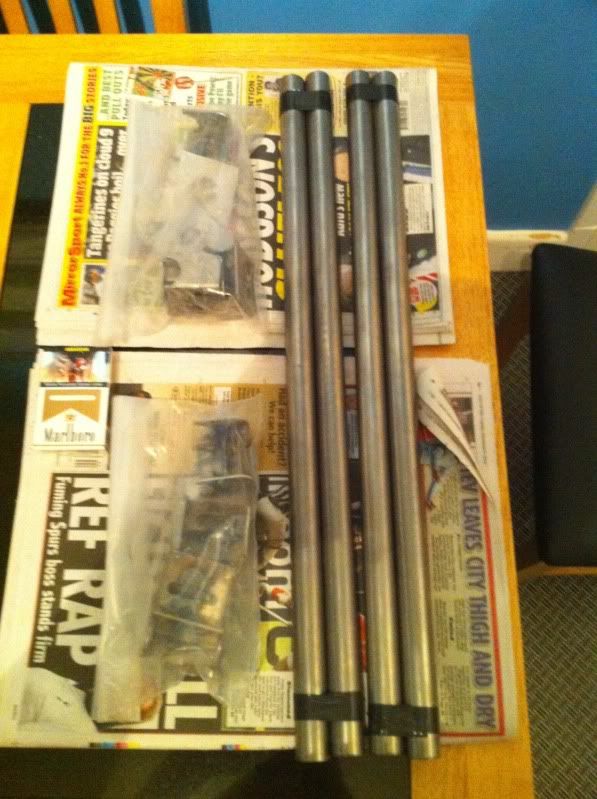
Two CDS tube seat mounting kits.


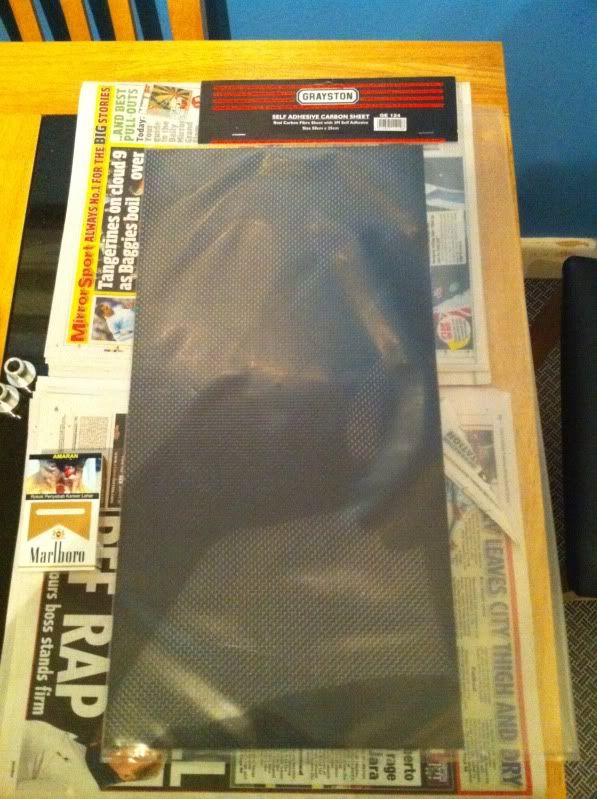
And finally a sheet of real carbon fibre with 3M selfadhesive on the back, I'm buggered if I'm going to pay £65 for 2 carbon vent covers off eBay! It will also come in handy for where my feet will catch the door bars & if I'm really lucky I'll be able to cover the top glovebox, it was just over £20 for a sheet, bargain!!!


I've also been doing a bit of research into snap off steering wheel bosses.
For motorsport use you must have a weld on boss that is spline located & is released by a circular YELLOW ring that must be behind the boss, that you pull towards you along the axis of the steering column to release the wheel. That counts out all but a handful of the bosses available on eBay. Looks like I'll have to save up another £130 odd quid for that thenDoh

Cool

________________________________________

Get used to seeing the yellow one !!!MehMehMehMehMeh
Team 330™Cool
Team "no front end or engine"
Team "LIMITED EDITION" I live for the 306 stickerSmug
Team 0-60 in 6.44 & standing qtr in 14.808 @ 94.55mph all with std engineSmug
203bhp Corolla T-Sport daily driver stealthier than Kwai Chang Caine
Posted 3rd Nov 2010 at 22:52
midlife

Seasoned Pro

Location: Colne, Lancashire

Registered: 13 Mar 2006

Posts: 7,544

Status: Offline

Post #225
Soz double postDoh

________________________________________

Get used to seeing the yellow one !!!MehMehMehMehMeh
Team 330™Cool
Team "no front end or engine"
Team "LIMITED EDITION" I live for the 306 stickerSmug
Team 0-60 in 6.44 & standing qtr in 14.808 @ 94.55mph all with std engineSmug
203bhp Corolla T-Sport daily driver stealthier than Kwai Chang Caine
Posted 3rd Nov 2010 at 00:12

Pages (16): first .. 8 [9] 10 .. last

All times are GMT. The time is now 19:42
The Peugeot GTi-6 & Rallye Owners Club - ©2024 all rights reserved.

Please Note: The views and opinions found herein are those of individuals, and not of The Peugeot 306 GTi-6 & Rallye Owners Club or any individuals involved.
No responsibility is taken or assumed for any comments or statements made on, or in relation to, this website. Please see our updated privacy policy.