displaying posts 326 to 350 of 404

Pages (17): first .. 13 [14] 15 .. last

Author Subject: Red Rallye S529 OAN
Chr1sch

Seasoned Pro

Location: Worcester

Registered: 02 Aug 2014

Posts: 1,025

Status: Offline

Post #326
This is both awesome and terrifying, mine is far worse underneath already, to the point where im almost scared to even start based on what you are finding!
Posted 3rd Apr 2017 at 11:07
Ben_W

Formerly gpm

Location: Lutterworth

Registered: 01 Sep 2007

Posts: 2,941

Status: Offline

Post #327
Rallye update time, although it's far from dramatic, doesn't contain much new and involves me grinding (form an orderly queue ladies… Big grin )

First job this morning was clean the Insignia in and out, and take photos for the Autotrader ad. Done, Autotrader ad now live.

Then it was out with the grinder and time to take a pew on the front wheels stacked up in the engine bay!

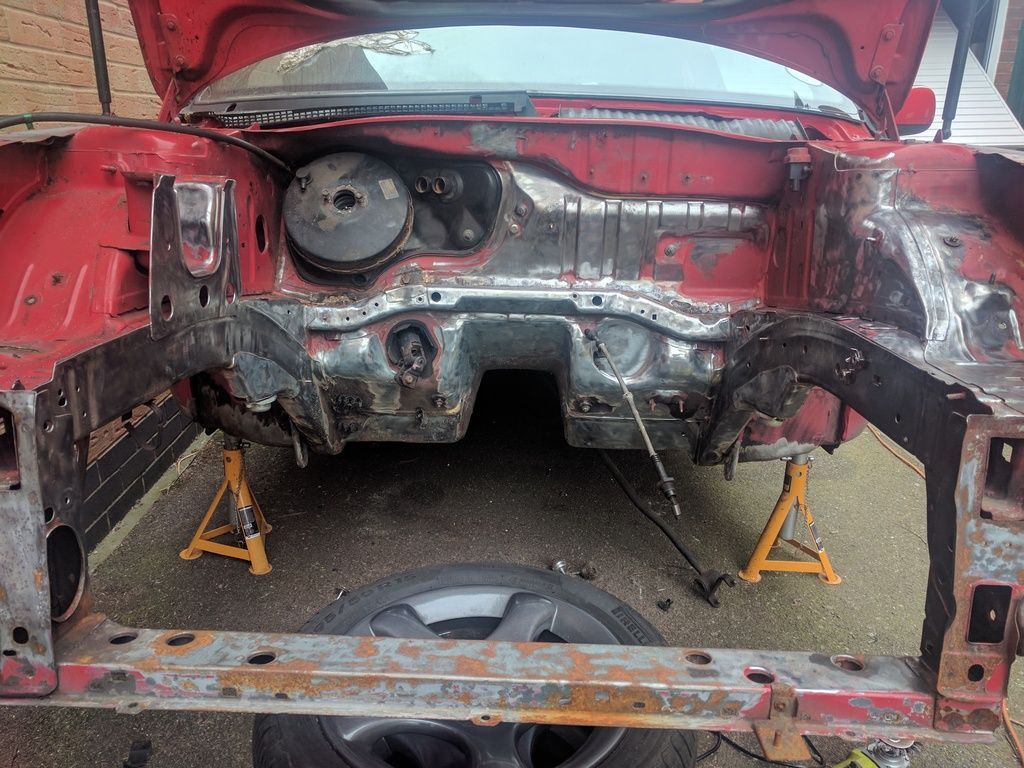
Not much to show, and I'll go into a few details in a minute but left it looking like this.


Getting there, slowly. I'm trying to do as much of the bare metalling as I can to keep any blasting costs down.

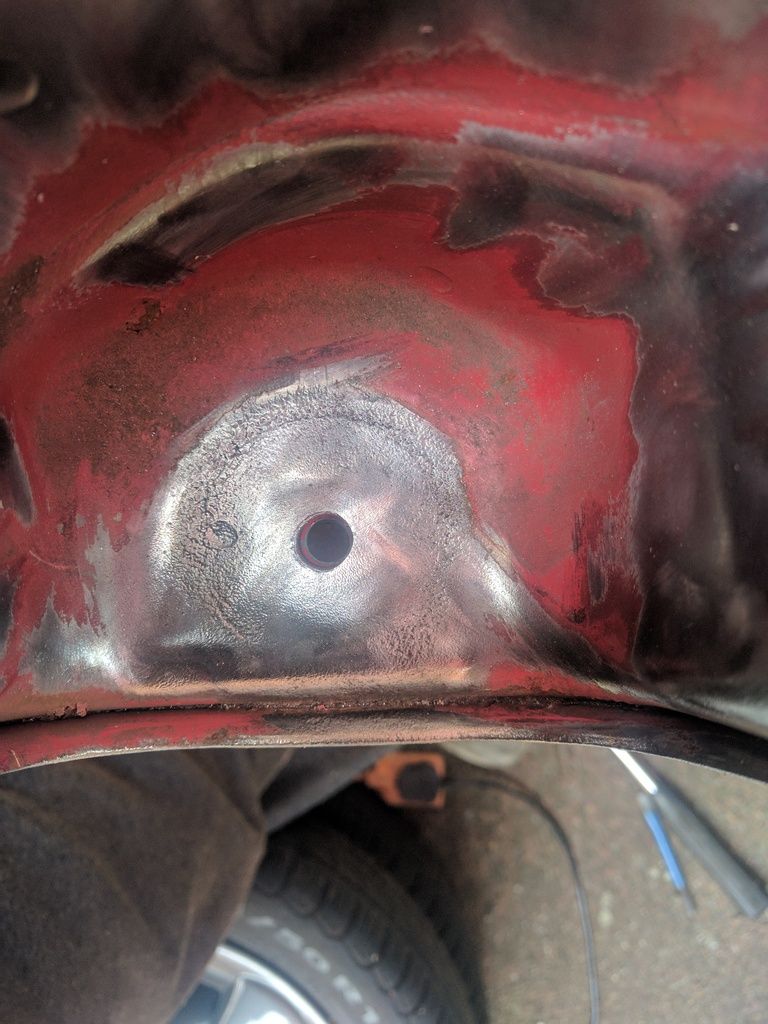
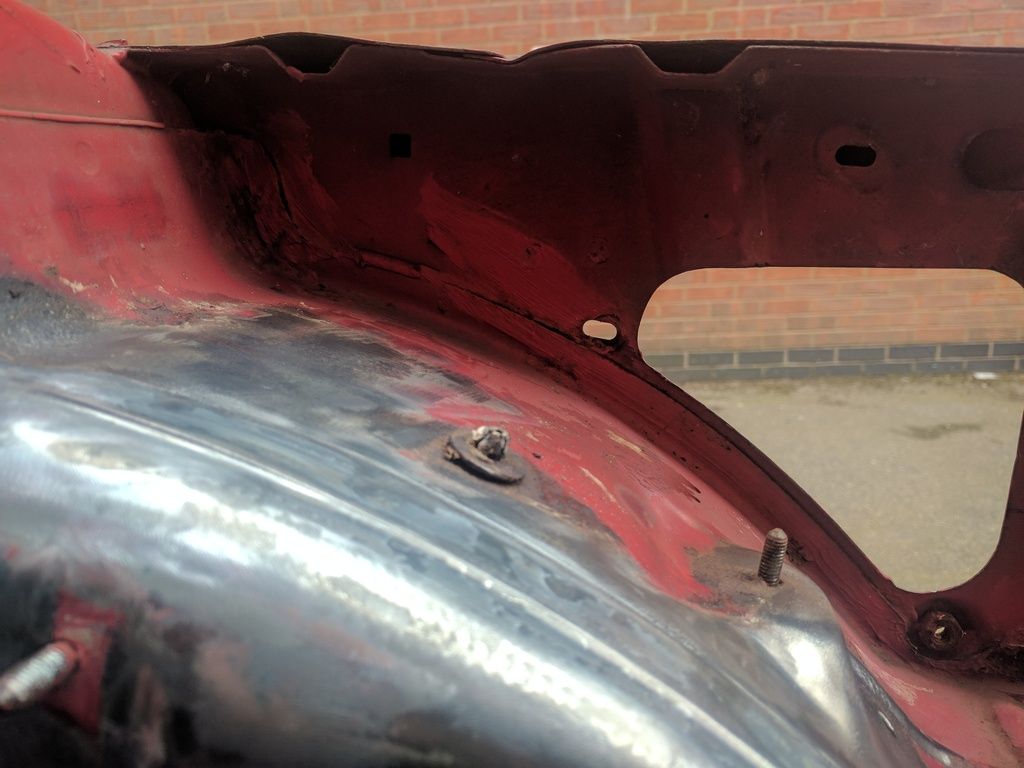
I took the driver side engine mount off. Doesn't look too bad. Need to finish removing the paint to check for any cracks but didn't look bad. You can certainly see where the washer sat.


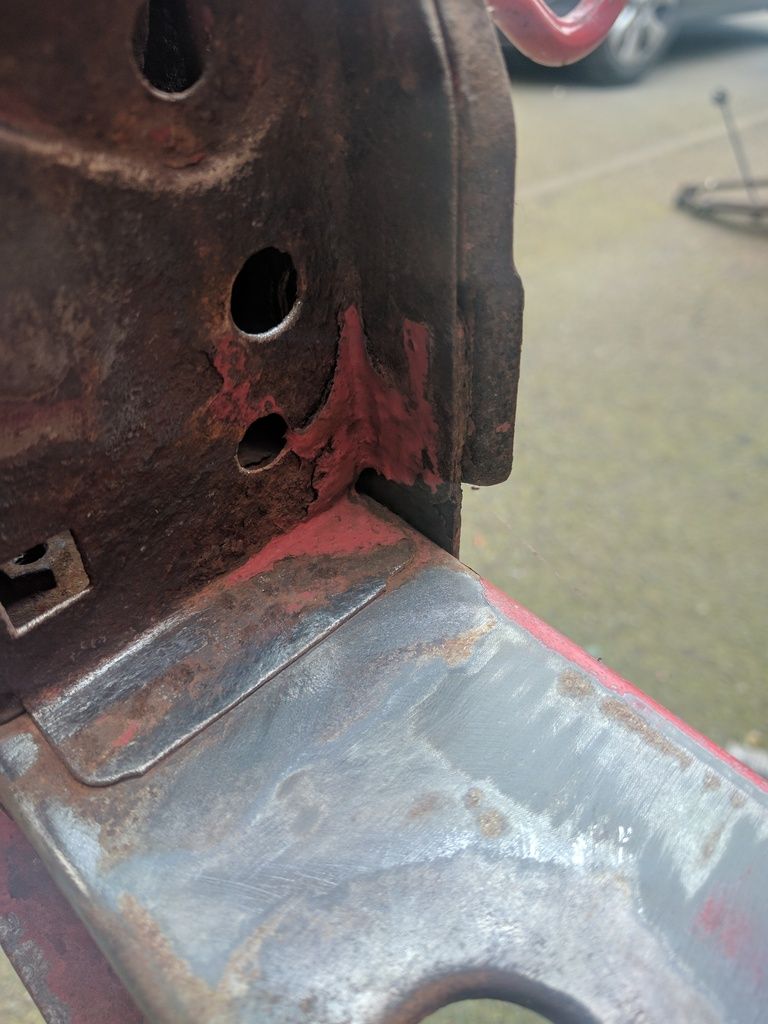
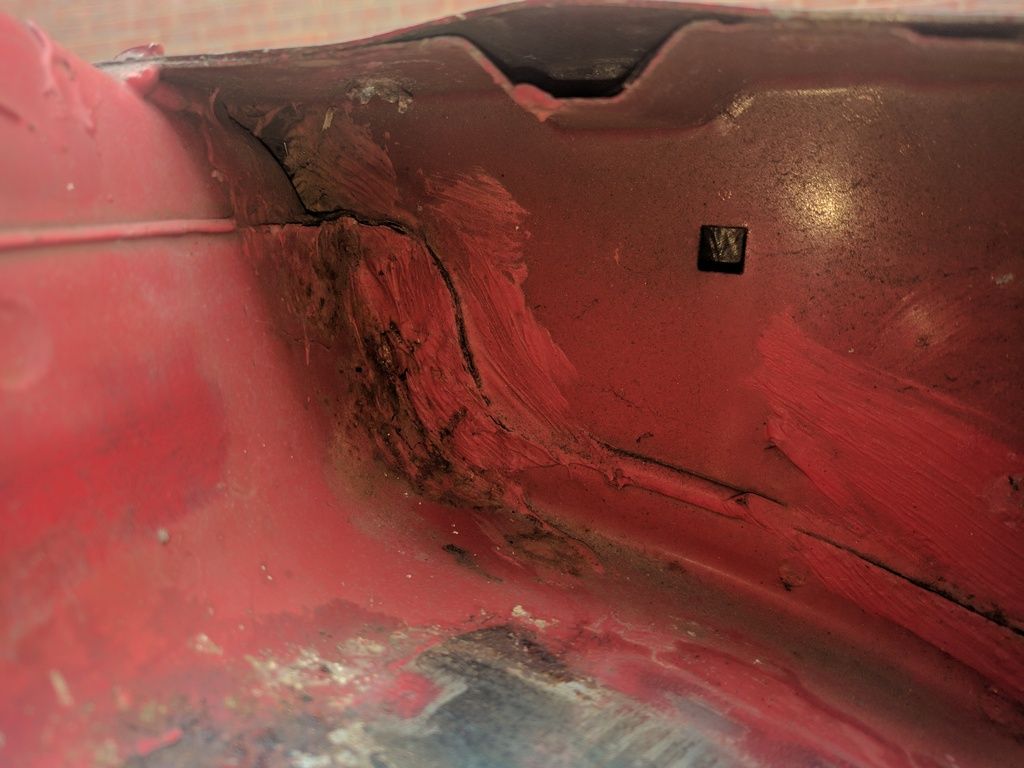
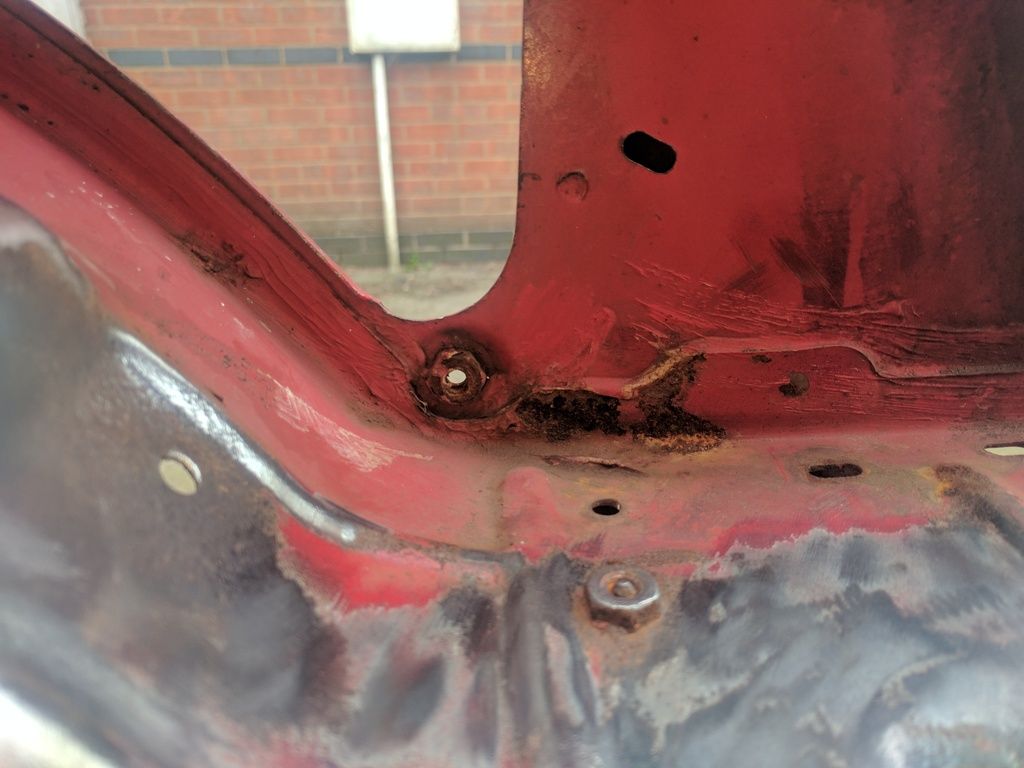
The next couple of pics (and I think a lot of previous ones where the failure of the underseal allowing water ingress), i think serve to prove that any 306 restoration will need a significant element of bare metalling. It's everywhere, to one extent or another.


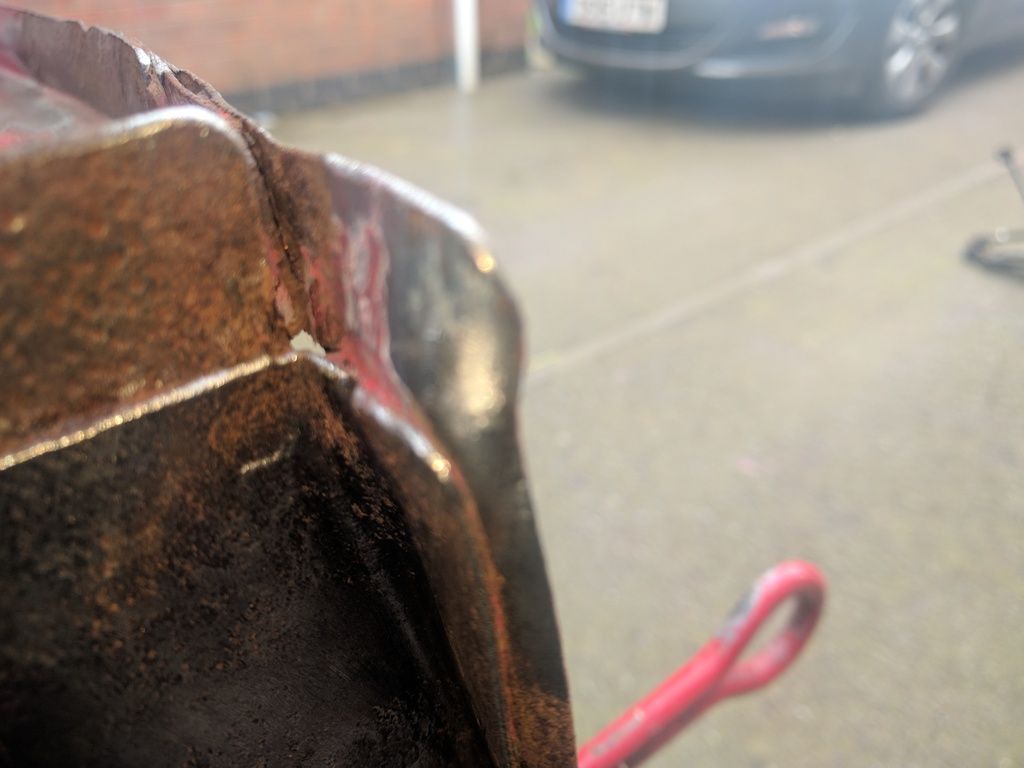
Now this bit doesnt look right. If i didn't know better, I'd say this had some kind of repair work when the car had its front end bump.


Again, some clear failure of some of the coatings/sealants, although accident damage may be the reason here.

________________________________________

Cherry Red Rallye .... On going OEM spec resto

China Blue GTi6 .... Weekend toy

Black 208 GTi .... Wife's car now

Silver BMW 550i.... The executive missile

Posted 1st May 2017 at 09:21
Ben_W

Formerly gpm

Location: Lutterworth

Registered: 01 Sep 2007

Posts: 2,941

Status: Offline

Post #328
Real shame photobucket turned into c**ts.....

Anyways, this is still in progress..

Another long day stripping Big grin Bought this as a donor for an engine....long story with what happened to my original one....

Nothing left really now. Just the rear beam to come off. Will be arranging for the shell to be collected this week.


Took a few more bits for myself. Main front to rear brake lines to use as templates as Peugeot don't supply pre bent stuff any more. Fuel lines as mine were covered in that horrible stone chip stuff. As many of the pipe fixings as I could get off... Etc. I also took lots and lots of photos to help as a reference when I start putting it all back together.

Really need to get back into this. Had two very decent PPi cheques over the last month so funds are now available.

First job is to get the car off and have the whole front end blasted and primed. Need to talk to them about how as I'd like to do the same as I've done underneath. I will be asking them to spot weld on the new brackets on the inner wing for the fuel cannister thing and the wiring loom on the passenger side. In the mean time, I need to start stripping down the engine, sort out all the bits I want powder coating and get them off to the powder coaters and look into whether it's worth having the subframe stitch welded before I have it coated.

I've also another parts list in with my man....waiting to hear on that.

________________________________________

Cherry Red Rallye .... On going OEM spec resto

China Blue GTi6 .... Weekend toy

Black 208 GTi .... Wife's car now

Silver BMW 550i.... The executive missile

Posted 10th Sep 2017 at 23:04
Ben_W

Formerly gpm

Location: Lutterworth

Registered: 01 Sep 2007

Posts: 2,941

Status: Offline

Post #329
Update for this....

Haven't done much work.on the Rallye as I've been finishing stripping the 6. All done now and shell being collected on Tuesday. Got a free engine and then some... Big grin

Parts man been very busy. Sourced a brand new beam tube with a very healthy discount and then a dozen NFP/NLA parts including a boot sound proofing layer, boot carpet and some beam bolts...


Car going off soon to a restoration place in Leicester to have the front end blasted and 2k primed....I've got an engine and box to strip.now and have the cases off to be vapour blasted....

________________________________________

Cherry Red Rallye .... On going OEM spec resto

China Blue GTi6 .... Weekend toy

Black 208 GTi .... Wife's car now

Silver BMW 550i.... The executive missile

Posted 16th Sep 2017 at 21:26
Ben_W

Formerly gpm

Location: Lutterworth

Registered: 01 Sep 2007

Posts: 2,941

Status: Offline

Post #330
Dragged my feet with this, membership here lasped etc....

Finally got the front end blasted. Debacle in itself but its done now.

url=https://ibb.co/hvPNec][/url]


Also got a rollover jig arriving next week so no more lying on my back...

Sourced lots more new parts, including a bonnet and a genuine brand new passenger side door for £25....

________________________________________

Cherry Red Rallye .... On going OEM spec resto

China Blue GTi6 .... Weekend toy

Black 208 GTi .... Wife's car now

Silver BMW 550i.... The executive missile

Posted 18th Mar 2018 at 11:33
barrym

Senior User

Location: Westcliff-on-sea

Registered: 26 Jun 2014

Posts: 502

Status: Offline

Post #331
Good to see you back, was wondering where you went.

________________________________________

China D Turbo HDi daily charger
Black Rallye occassional toy
Posted 18th Mar 2018 at 12:10
Kenan

Regular

Location: Exmouth

Registered: 20 Oct 2013

Posts: 307

Status: Offline

Post #332
quote:
[quote="barrym"]Good to see you back, was wondering where you went.


You can follow the progress on this on Detailing world - http://www.detailingworld.co.uk/forum/showthread.php?p=5447574#post5447574
Posted 18th Mar 2018 at 13:38
Ben_W

Formerly gpm

Location: Lutterworth

Registered: 01 Sep 2007

Posts: 2,941

Status: Offline

Post #333
To make life easier with the work i have still to do on the underside, i bought a rollover jig. If im honest, i should have done this at the start but i didnt think id get this deep into a restoration. Bare metalling the underside took an ages and made a mess of my back and shoulder and it took the physio a while to get it right….not going there again.

So, i asked about on one of the Facebook groups and was recommended a self loading jig that comes in a kit form for pretty sensible money. The self loading bit sold it to me as i was worried about how id get it up onto a jig. So Tuesday night this week, i picked it up from the guy on my way home. Spent an hour yesterday putting it together.

Came with the biggest pair of nuts ive seen in ages. I think they are M486…!


An hour and a couple of cups of tea and…..ta-daah!


Fixing the car to the jig is easy enough. The front chassis legs are open with available holes to the sides so thats easy.


The rear, less so. The guy who recommended me the jig has a 306 on one but had some properly custom mounts made for the rear, involving drilling extra holes into the body. I wasn't over keen on that approach.


It was suggested a towbar might be a much better way to go. Seems sensible, given it bolts up to the chassis legs at the rear. Far stronger. So a quick post again on one pf the facebook groups turned up one 20 miles from me.

Picked it up on the way home and got home to my massive box of stuff from Bilt Hamber.


More Electrox, Epoxy Mastic, spray electrox for the hard to reach corners, seam sealant and Hydrate 80.

I've a mate whos a coded welder by trade. He popped by today and picked up the tow bar and bracket from the jig. He's going to weld some extra bars on that will connect directly to the jig. That sorts that out. Also got a brand new drivers side wing for £30.

So, this morning, with a hangover, i went out and took off the polythene sheeting. Given we are a week on from blasting, id been worried about flash rusting. No real issue in the end.


So got busy with the Hydrate 80. The blurb from BH is:

“Hydrate 80 provides powerful protection to rusted steel surfaces, its electrochemical function stabilises existing corrosion by converting the iron oxides into a protective metal complex, it also combines with surface moisture and oxygen depriving the corrosion process of the conditions it requires. Paints and coatings applied to a hydrate 80 treated surface demonstrate amazing improvements in long-term performance”

Not that the original surfaces were rusty, not after the blasting anyway. Little bit of flash surface rust but thats it. It is however, a very good coating to put down to protect the metal. It goes a funky colour…


Much application later and the engine bay has its first coat (you have to apply two, second coat at 90° to the first, to ensure proper coverage i assume)


Couple of bits the blaster missed which ill deal with when the shell is on the jig.


Called it a day at this point as i had my neighbours Jag to fix and two utterly filthy cars to wash…..


________________________________________

Cherry Red Rallye .... On going OEM spec resto

China Blue GTi6 .... Weekend toy

Black 208 GTi .... Wife's car now

Silver BMW 550i.... The executive missile

Posted 25th Mar 2018 at 20:07
mik

Seasoned Pro

Location: Kent

Registered: 17 Feb 2011

Posts: 2,100

Status: Offline

Post #334
Great work. Blasting looks great, reminds me I've got to get my engine bay done at some point.

If you are going to use Electrox it is best to use it on bare metal, not undercoated with Hydrate 80. Galvanic coatings work by being in direct contact with the substrate and being a sacrificial anode. I'm not convinced by Hydrate 80 or other rust converters as long-term corrosion protection on larger areas, especially when you won't be able to get at most of the steel again once the engine is in. Others may have a different view.

Electrox is excellent, in my project thread you can see a disc protector that was scuffed up, primed with Electrox and over-coated with silver. I wiped off road grime and it was still corrosion free after around 4 years on the car. The underside of my Rallye was painted with Electrox and is still perfect 5 years later. I over-coated it with stone chip and oil-based enamel which has held up well (plus Dynax UC over the top), but I would have used Epoxy Mastic if I'd known about it at the time.

________________________________________

Cherry Rallye SOLD

Posted 26th Mar 2018 at 07:51
Ben_W

Formerly gpm

Location: Lutterworth

Registered: 01 Sep 2007

Posts: 2,941

Status: Offline

Post #335
My welder chum sent me some pictures at dinner....


Told him i liked his gussets.....LOL: certainly looks as though it will do the job once bolted together! I also ordered a pair of mounts for the front front the guy who makes the jig. Thought I'd be ok without, turns out probably not.

And finally got to pick up the parcel of bits I've been waiting.to collect. These are the parts my parts guy got from the dealership my bonnet came from. Rear beam mount, front ARB brackets, bumper bolts, fuel filter strap, door light switch and a couple of others I've forgotten probably....


________________________________________

Cherry Red Rallye .... On going OEM spec resto

China Blue GTi6 .... Weekend toy

Black 208 GTi .... Wife's car now

Silver BMW 550i.... The executive missile

Posted 27th Mar 2018 at 19:03
Ben_W

Formerly gpm

Location: Lutterworth

Registered: 01 Sep 2007

Posts: 2,941

Status: Offline

Post #336
Realised my plan for front mounts wasn't going to work so hastily ordered a pair from guy who makes the jig. Had them delivered to work today to make sure I got them...


Modified towbar comes back tomorrow so looks like I'll be getting the shell in the air for the weekend.

________________________________________

Cherry Red Rallye .... On going OEM spec resto

China Blue GTi6 .... Weekend toy

Black 208 GTi .... Wife's car now

Silver BMW 550i.... The executive missile

Posted 29th Mar 2018 at 12:06
Ben_W

Formerly gpm

Location: Lutterworth

Registered: 01 Sep 2007

Posts: 2,941

Status: Offline

Post #337
So, the towbar is on. Not without a fight, but it's on.

First issue is that we didn't measure properly where to put the additional spars. Balls. Only out by an inch at most but out to the point it wouldn't fit, so out came the hacksaw....


I will have that welded back in at a later date....

Onto fitting proper......It's supposed to bolt through the chassis with two M10 bolts either side. Now, whichever numpty made the rear chassis rail for this car decided to leave a lump of weld in one of the holes, meaning the M10 bolt wouldn't fit. It's right up in the corner of chassis rail/boot floor so there is no hope of getting a drill into it either. The other side was just full of crap. I ended up switching down to M8 bolts. Not ideal but I guess it will do the job. Eventually, after much cursing, bashing if head followed by even more cursing, removal of electrox and mastic from screw threads, we were on....


Got the front mounts on.


Had to get the wife to get me some 40mm M10 bolts whilst out as I thought up had some but I can't find them....


Slight issue in that the rear is too low. I jacked it up to raise the axle stands that are under the rear currently. Turns out they're already at full height. I need to swap the ones from the front to the rear as they are taller. The front is already more than high enough.


Got the front all connected up. The rear is ready, just needs lifting and the car levelling off.

Before I can do anymore, I need to remove the rear beam. A mate has got a taller set of axle stands I can borrow so picking them up tomorrow. Once I've got it lifted, I can then attach the rear properly and connect the brace between the two uprights. Then, lift!!

The forecast for the next two days here is awful. Heavy rain pretty much solid. At least it's not snow!


________________________________________

Cherry Red Rallye .... On going OEM spec resto

China Blue GTi6 .... Weekend toy

Black 208 GTi .... Wife's car now

Silver BMW 550i.... The executive missile

Posted 1st Apr 2018 at 13:54
Ben_W

Formerly gpm

Location: Lutterworth

Registered: 01 Sep 2007

Posts: 2,941

Status: Offline

Post #338
She flies......


Need to take it up more before i can fully turn it over but impact gun flat so having to do it buy hand.....

Still, pleased!

________________________________________

Cherry Red Rallye .... On going OEM spec resto

China Blue GTi6 .... Weekend toy

Black 208 GTi .... Wife's car now

Silver BMW 550i.... The executive missile

Posted 1st Apr 2018 at 19:28
Ben_W

Formerly gpm

Location: Lutterworth

Registered: 01 Sep 2007

Posts: 2,941

Status: Offline

Post #339
Right, quite why I didn't buy a rollover jig in the first place (other than being a tight git!) I don't know. Hindsight being the thing it is, I could have saved a lot of time, energy, discomfort and physio bill if I'd bought one of these first.....

It rained until about lunchtime and I didn't think I was going to get anything done. However, the rain stopped, so I started.

Brew in hand, I wandered out side. Manouevered the jig into position a little, rolled her on her side, marvelled at what a tool I'd been trying to do this without a jig and got cracking.

Most of the underside was fine. A few spots showing a little surcae rust which I attacked with the grinder, thinking is was perhaps poor prep first time round. In a couple of places, it may have been but lack of room and light to see what's what won't have helped much but in all honesty, I think it's probably the zinc in the Electrox doing its sacrifical thing. Either way, when I took back the coatings, in most places it was good, clean bare metal underneath. This really is testament to the quality of BH Electrox and Epoxy Mastic. It's been sat outside for over two years with no cover, no nothing. Other than a few cobwebs and dust and dirt, it's as clean as the day I did it.

Anyhow, down to the business of grinding (as I once said to the wife with a cheeky wink as she sighed and rolled her eyes....)

The only bit of the car I never got any protection on was perhaps the first 6-9" inches front the bulkhead back. I just left it bare. Some surface rust, but again, nothing serious. The only real issue I have here is that these sections, as on so many GTi6 & Rallyes, have been mistakenly used as points to jack the car up. You can see the indentations. I've two options. Either drill all the spot welds, remove, straighten and spot weld back on or try a technique to pull body panels out where a series of hooks are spot welded along the panel and a rod passed through which is then used to pull the panel out. I doubt very much I'll find new sections, I'll ask my parts guys but not hopeful.

Anyways, Imgbb is good but a pain to try and organise pictures so I'll just post the lot. I had to nip out mid afternoon as clearly my wire brush was done! I also decided to split the three sections that made up the section of sill that was properly squished and attacked them with a wire brush on a drill before going at them with the Hydrate 80.

The only other bit that was a real issue was that odd closed box section that forms the rear suspension bump stop. I got in there with another wire brush bit on a drill as much as I could but access is still awful, even with the car on its side. I then applied as much Hydrate 80 as I could. Did the underside of the chassis legs too then gave everything id done a good coat of Hydrate 80


________________________________________

Cherry Red Rallye .... On going OEM spec resto

China Blue GTi6 .... Weekend toy

Black 208 GTi .... Wife's car now

Silver BMW 550i.... The executive missile

Posted 5th Apr 2018 at 22:19
Ben_W

Formerly gpm

Location: Lutterworth

Registered: 01 Sep 2007

Posts: 2,941

Status: Offline

Post #340
What a damn fine morning this morning turned out to be. To coin some more lyrics…..what a difference a day makes.

Finally dragged myself from my bed (started back at the gym with my cousin on Tuesday and God were my muscles meeting me know they weren't happy!!), made a cup of tea and ventured forth.

Now, my garage is set behind my house with the drive running down the side of the house. My front door points pretty much west, meaning the sun shines on the side of the house opposite to the garage. Not an issue. My jig has wheels. Rallye, walkies! Nothing better than finally feeling a little warmth from the sun on my skin.


Id bought a spray can of Electrox as part of my Bilt Hamber booty box, planning on using that for hard to reach areas. However, having had a think, a spray finish is much better than a brush finish so I decided that for all things engine bay, I'd use the spray as you are likely to see much more and finish is critical…

Suspension turrets and engine bay…


Rolled her on her side and got on….handbrake cables have been annoying me for months…not getting in the car now it's on the jig so….


Mr Angle grinder and his cutting blade pal sorted them….


Cleaned up the rear arch. Deox Gel did a job, but not as well as I expected. The grinder finished it off…


Further up in the arch, I noticed a scab..


I'm glad I found and treated this as I've seen so many 306’s rot through here, mostly estates though.nQuite why, I've no idea but it's right next to a seatbelt mounting point sound normally sounds the death knell for a 306 if left….

So after doing lots of little bits and pieces, I got onto applying another coat of Electrox. It had already had one, but I think it was a thinned down coat to allow it to flow into the seams etc..I can’t remember for sure so I figured a full fat layer of Electrox wouldn't hurt….

Going on…


Finished…


Close up of finish. Seems odd painting a car with a brush and when striving for perfection, almost downright uncomfortable. The stuff is very thick and solvent based so spraying wouldn't be an option unless thinned significantly, which will then detract from lifespan performance I'd imagine. It's like glossing in the house and I HATE that bloody job. In the end, the finish wasn't too bad….


Browsing the BH website, I discovered they do a product called Flatface:

[url]https://www.bilthamber.com/flat-face[/url]

Touted as:

‘Sprayable polyester filler allows very high build levels in one application – easy sanding.’

Apparently sits over the epoxy mastic very well, providing a flat surface for final coats. There go the worries about brush marks in the mastic. The guys at BH really do seem to have thought of everything. I can't praise them enough.

Biggest issue I came across today was jig issues…was a bit more difficult to push and having had a look, I can see why. Thought I'd got the centre spar/brace positioned correctly but clearly not. I looked at the video that the guy selling them linked in his advert and the people have added a ratchet strap between both uprights. I plan on taking up the strain, loosening the bolts on the brace, ratcheting until the uprights are vertical and retighten the bolts which will pin it all together.


All in all, a bloody enjoyable day working on this.

________________________________________

Cherry Red Rallye .... On going OEM spec resto

China Blue GTi6 .... Weekend toy

Black 208 GTi .... Wife's car now

Silver BMW 550i.... The executive missile

Posted 5th Apr 2018 at 22:18
foot

Senior User

Location: worthing

Registered: 09 Aug 2008

Posts: 754

Status: Offline

Post #341
slowly making progress! looks good
Posted 5th Apr 2018 at 22:35
jord294

Seasoned Pro

Location: somewhere in north wales

Registered: 09 Nov 2009

Posts: 3,110

Status: Offline

Post #342
Good effort.

Am looking forward to doing both my cars

________________________________________

FRESHLY RE-FURBISHED GTI BEAMS
FITTING AND LOWERING AVAILABLE.
ALL AXLES BUILT USING GENUINE PEUGEOT PARTS

IF I'M NOT HERE, IT ONLY MEANS ONE THING.... I'M SOMEWHERE ELSE!
Posted 6th Apr 2018 at 07:10
mik

Seasoned Pro

Location: Kent

Registered: 17 Feb 2011

Posts: 2,100

Status: Offline

Post #343
Looks great. After seeing that I'm itching to get at the bump stop areas on mine!

Regarding the jacking damage on the cross-members, the pinholes probably make it nugatory to try and pull it out to original profile, as the metal will be very thin if it is pinholed, thinner than it would have been originally. Also if pinholed the metal will be rusty on the inside, problematic to patch as not much to weld onto air etc.

When I looked in 2012 these parts were still available called ''stiffeners'' on servicebox. We all need a stiffener now and then. But they were a couple of hundred pounds each. Maybe your parts guy can assist? What I ended up doing was getting the nasty ones cut off, new ones fabbed up, painted on the inside with Bilt Hamber Etchweld primer, welded on and then copious quantities of Dynax S50 blown in there, making sure to replicate the drain holes. Still looks perfect 5 years later, although the garage that did them had to replace them after jacking the car up on them and caving them in. Now I put a post-it note on the steering wheel saying where (not) to jack it when I drop the car off to a garage for any reason.

________________________________________

Cherry Rallye SOLD

Posted 6th Apr 2018 at 13:26
Ben_W

Formerly gpm

Location: Lutterworth

Registered: 01 Sep 2007

Posts: 2,941

Status: Offline

Post #344
Mik,

Yeah, the bumpstop boxes are a horror. Probably a good reason they were designed the way they are but are just water/crap traps and awful to try and get any kind of kit that would sort them out, into.....

The cross members yes, are going to need something. Have you got part numbers for them? I have had a good look on service box but can't find anything specific....

________________________________________

Cherry Red Rallye .... On going OEM spec resto

China Blue GTi6 .... Weekend toy

Black 208 GTi .... Wife's car now

Silver BMW 550i.... The executive missile

Posted 6th Apr 2018 at 17:45
Ben_W

Formerly gpm

Location: Lutterworth

Registered: 01 Sep 2007

Posts: 2,941

Status: Offline

Post #345
I did a bit more Friday morning but it was pretty windy so scuppered my plans to do any painting really, it was too windy for that. I bare metalled a couple more bits i needed to, including the passenger side rear arch. This was the first thing i ever did on the car, i bare metalled it, used some rust prevention stuff (not hydrate 80) and then overpainted it. 

Ive not been properly happy with the finish and i could see some rust bubbles forming under the paint again so i stripped it all back. Sure enough, there was some surafce rust bubbling away. Cleaned it up as much as i could and then gave it a good going over with the Hydrate 80. I didnt get any pics at this stage. Today, with the weather being warmish and nowhere near as windy, i used the spray Electrox and primed it.


Happier with that. Whilst it was on its sides, i pretty much finished off the engine bay and got as decent a layer of the Electrox into the bumpstop boxes as i could. Not perfect, but better.


Just a little bit more to do on the front end now but need to pick up some masking tape to mask a few bits off before hand. Tomorrow, i may well start on the application of the epoxy mastic, depending on the weather.

________________________________________

Cherry Red Rallye .... On going OEM spec resto

China Blue GTi6 .... Weekend toy

Black 208 GTi .... Wife's car now

Silver BMW 550i.... The executive missile

Posted 7th Apr 2018 at 16:29
mik

Seasoned Pro

Location: Kent

Registered: 17 Feb 2011

Posts: 2,100

Status: Offline

Post #346
No part numbers with me, I'm overseas at the moment. I'll take a look when I'm back but I'm sure I found it under the bodywork tab in Servicebox.

________________________________________

Cherry Rallye SOLD

Posted 7th Apr 2018 at 21:16
Ben_W

Formerly gpm

Location: Lutterworth

Registered: 01 Sep 2007

Posts: 2,941

Status: Offline

Post #347
Mik,

Spent the morning going through every available body tab for my VIN on SB and found the document which i think details what im looking for....

Initially, i thought they were parts 14 and 34 but then having had a look at a picture of my underside, clearly not as these appear to be the shorter bars that run either side of the exhaust tunnel. Further looking shows parts 1 and 21 (although both part numbers are made up of two panels/parts) appear to be the main chassis legs. The only bits i can see that join to these are parts 15 and 35 although i cant tell if they are the correct panel or if they are the small triangular bits with a hole innthe middle that mount further back....


Either way, they are all marked NFP so are going o be a devil to find id imagine. Not exactly a part a dealership would keep on the shelf. Bonus is, if a dealer does have one, there wont be much call for them, they will want rid, so possibly a deal to be done.

Let me know your thoughts on the part numbers i think it is. Ill get him on the case, see anyone can turn up any. If they can, ill get pictures first to confirm either way.....

________________________________________

Cherry Red Rallye .... On going OEM spec resto

China Blue GTi6 .... Weekend toy

Black 208 GTi .... Wife's car now

Silver BMW 550i.... The executive missile

Posted 8th Apr 2018 at 14:51
pug_306

Seasoned Pro

Location: Great Hockham

Registered: 28 May 2013

Posts: 1,592

Status: Offline

Post #348
https://rover.ebay.com/rover/0/0/0?mpre=https%3A%2F%2Fwww.ebay.co.uk%2Fulk%2Fitm%2F192507224365

Might be handy for you buddy

________________________________________

1998 Supercharged White Rallye
1992 205 GTi6
205 Turbo 340bhp
Posted 10th Apr 2018 at 18:36
Ben_W

Formerly gpm

Location: Lutterworth

Registered: 01 Sep 2007

Posts: 2,941

Status: Offline

Post #349
Ryan, you sir, are a saint.

That just solved a whole heap of problems trying to find bits.........although its for a phs 1/early phs 2 car pretty much all the clips and stuff were the same and i will use pretty much all of it.

Bought.

________________________________________

Cherry Red Rallye .... On going OEM spec resto

China Blue GTi6 .... Weekend toy

Black 208 GTi .... Wife's car now

Silver BMW 550i.... The executive missile

Posted 10th Apr 2018 at 19:22
marksorrento205

Seasoned Pro

Location: Airborne in the lanes

Registered: 26 Aug 2008

Posts: 2,223

Status: Offline

Post #350
I bought item 34 for mine and it included item 35.

________________________________________

How to do a clicky: [url =http://www.306gti6.com]click here[/url] remove the space between [url & =
Posted 10th Apr 2018 at 20:57

Pages (17): first .. 13 [14] 15 .. last

All times are GMT. The time is now 23:17

The Peugeot GTi-6 & Rallye Owners Club - ©2024 all rights reserved.

Please Note: The views and opinions found herein are those of individuals, and not of The Peugeot 306 GTi-6 & Rallye Owners Club or any individuals involved.
No responsibility is taken or assumed for any comments or statements made on, or in relation to, this website. Please see our updated privacy policy.