Thought I would take the time to put up a little bit more about this whole detailing thing, a bit more meat on the bones if you like and explain a little more on what its all about. Not touting for business in any way, just wanting to go through a few basics for people.
If you look at your car under any form of artifical lighting you might see traces of what is commonly known as swirlmarks, cobwebs, scratches, etc. This is obviously apparent in sunlight too but next time your walking back to the car from buying fuel and you catch the reflection of the lights on the roof or bonnet, you will see what I mean!!
A Few examples:-

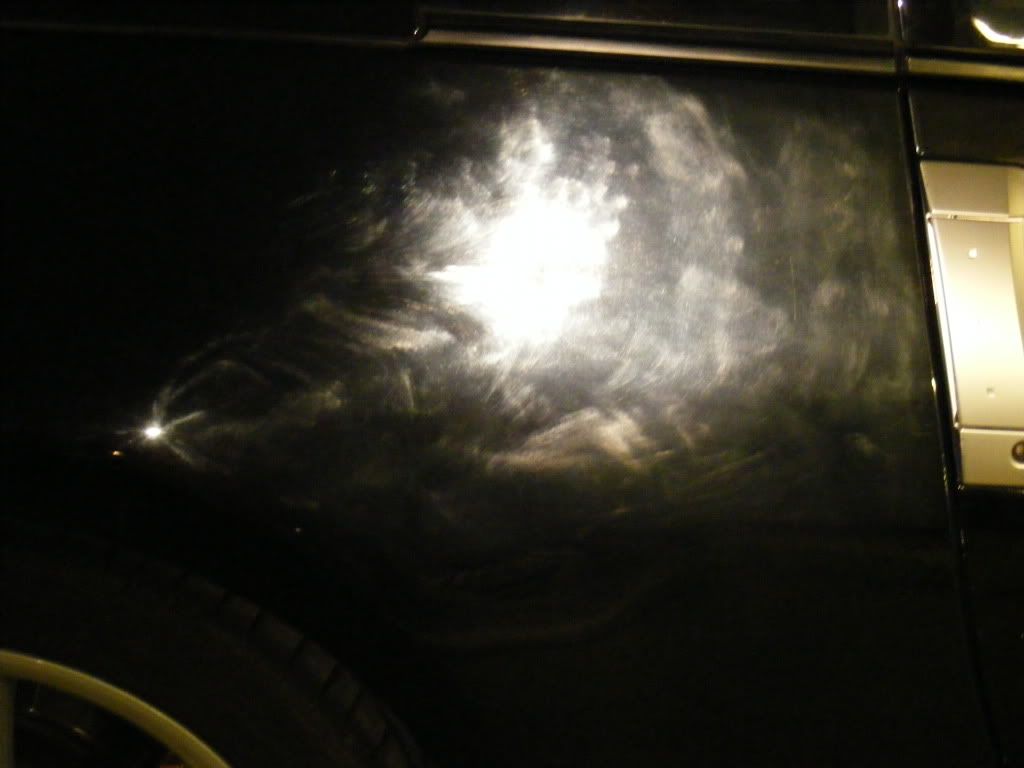
And the same damage after correction:-
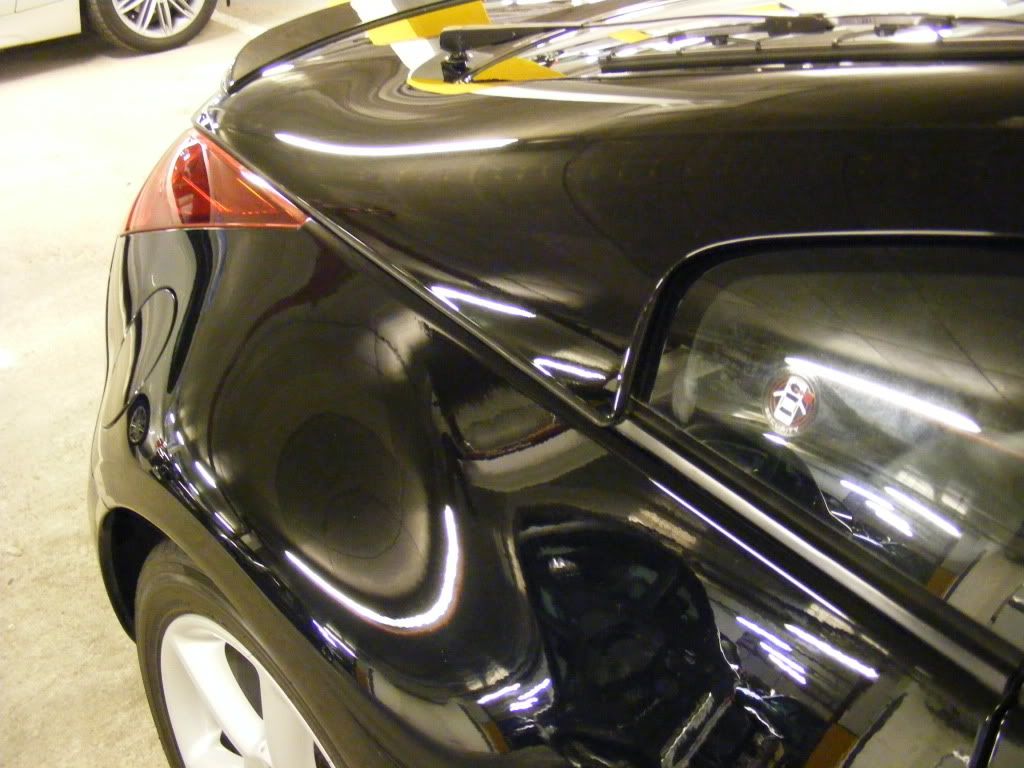
An RS4 Bonnet Prior to correction:-
And on completion:-

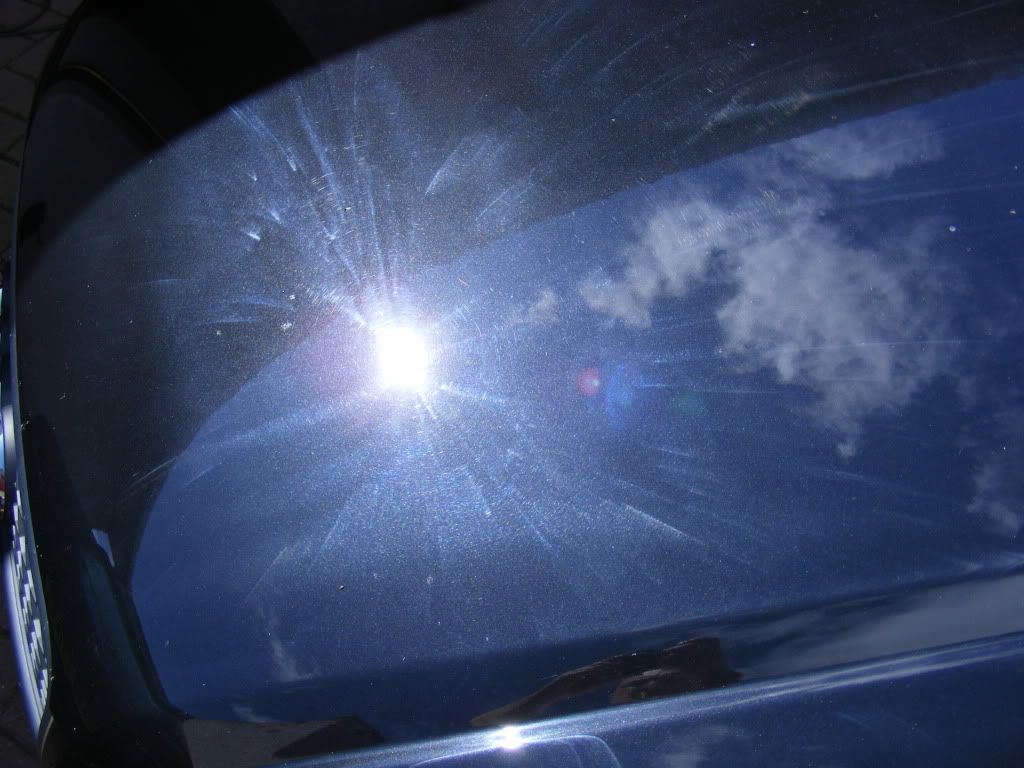
Focus RS ( 52 plate ) which has suffered from tlc, too much cleaning, polishing etc with techniques that could have been better:-
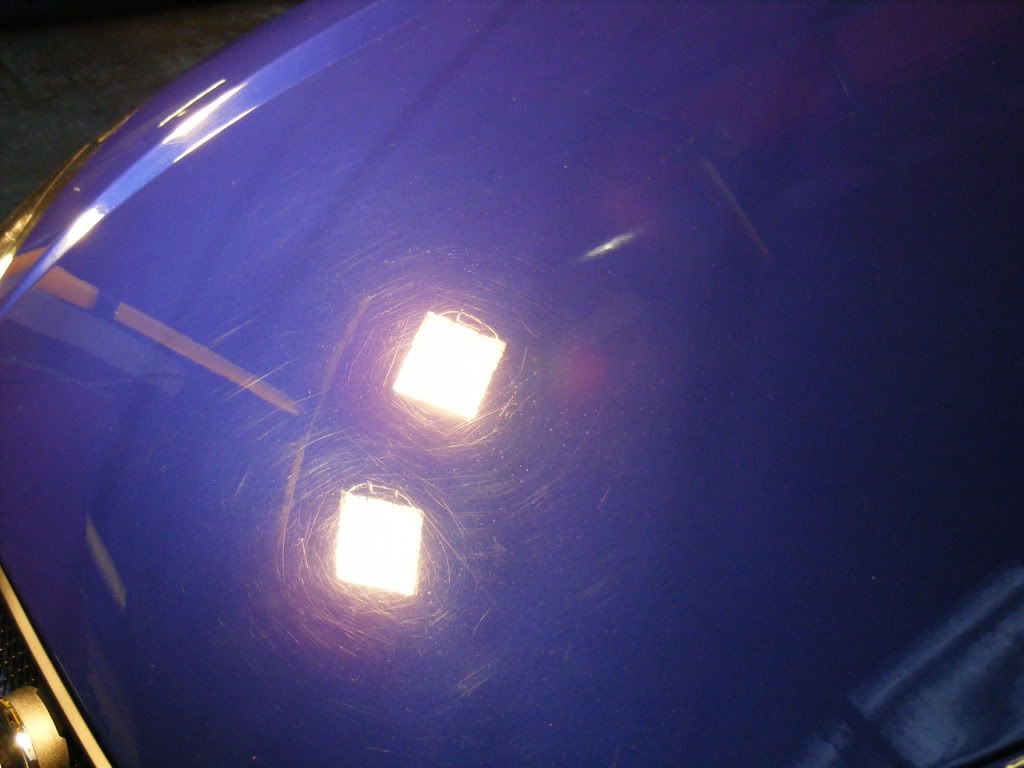
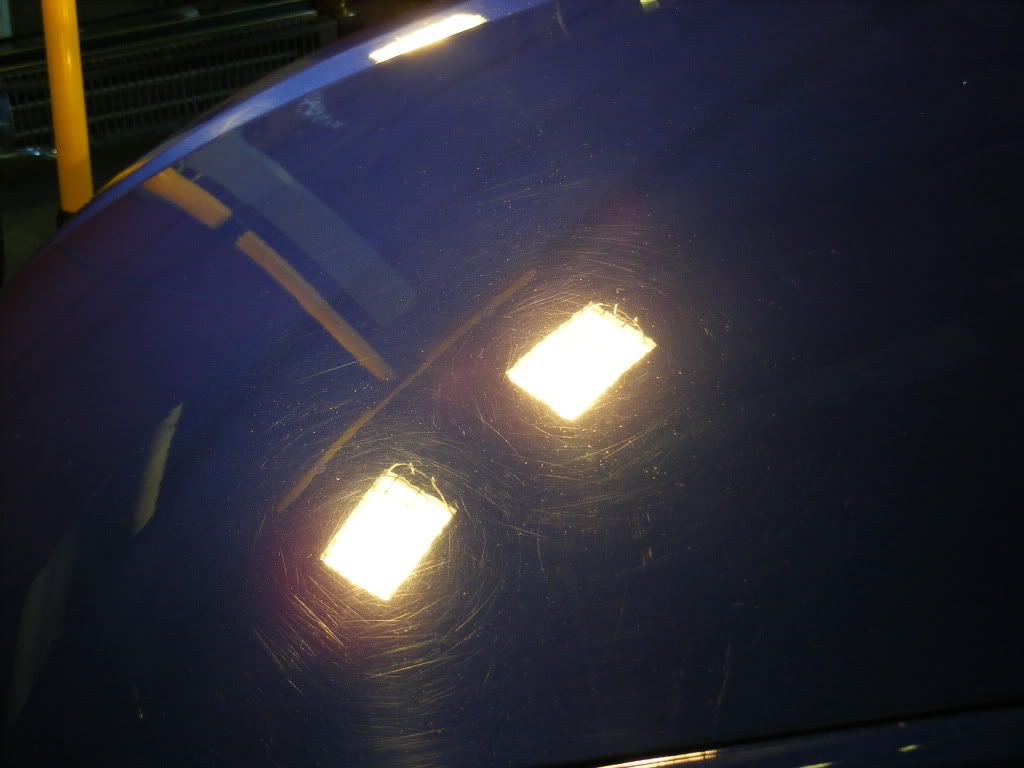
And corrected:-
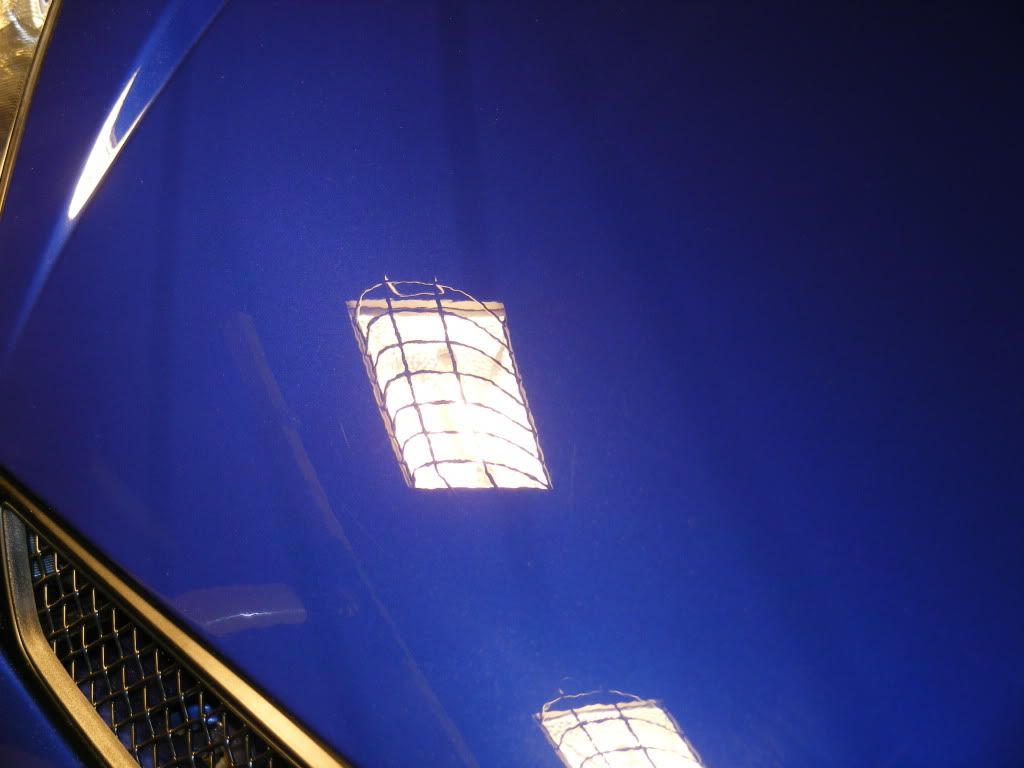
And the side of the RS:-
Before:-
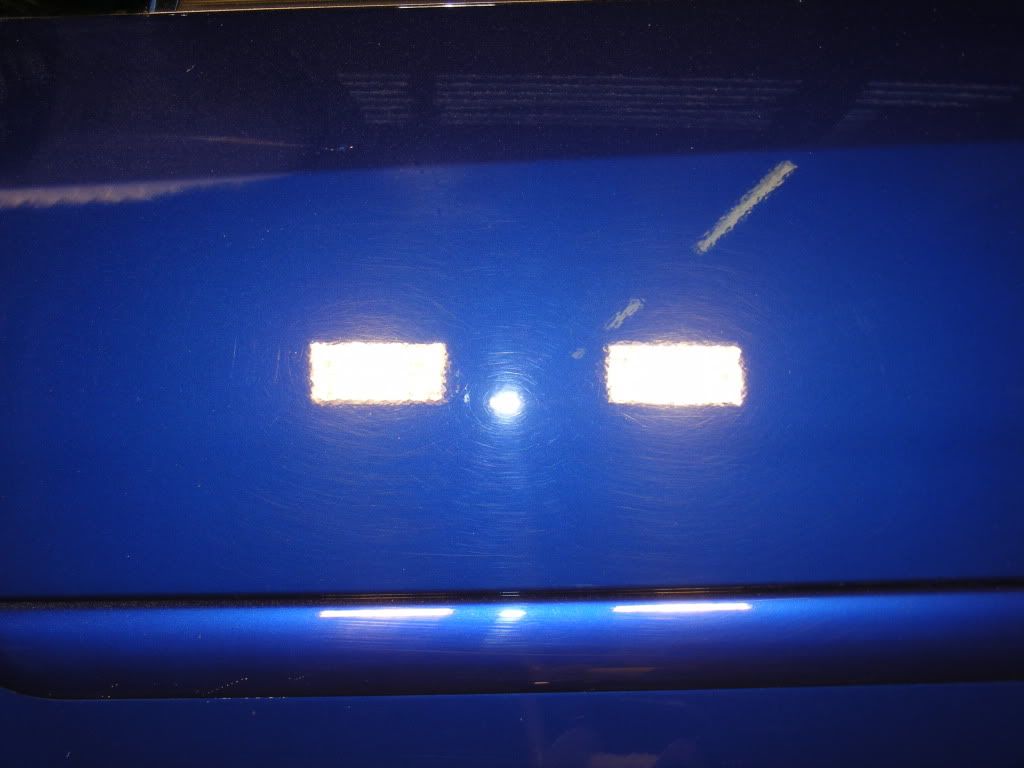
And again after:-
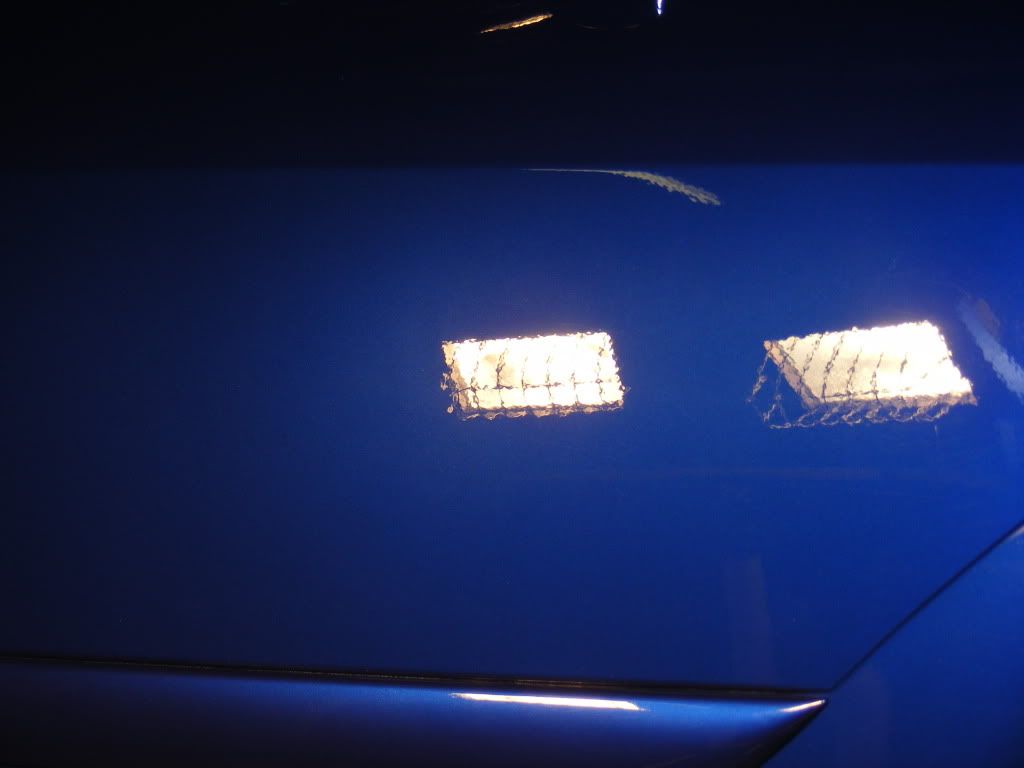
So what causes these marks? A number of things. Even taking a new car in a showroom you will see traces of these marks ( In some cases more than traces!! ). Modern day paint finishes are water based and much softer than older cars, giving a top surface which is more succeptable to damage and marking, easier to damage and the defects that are induced appear visually more evident then those of cars from years gone by. The use of lacquers now enhances the appearance of a car, but the trade off is any defects are now easier to see too.
Causes:- mainly Poor washing techniques. If you imagine the surface of the paintwork, any dirt or debris thats there is sitting on the panel. If this is removed with a sponge or mitt then the chances are you will drag the dirt across the panel, causing the paint to be damaged. Best this to try and avoid this is to remove as much as possible prior to touching the car at all, using the hose, pressure washer etc. If using a pressure washer, even the water pressure can sometimes be enough to damage paint, so use at a 45 degree angle to the car to avoid the direct spray.
Use a Traffic film remover if you can (TFR), this will break down the dirt and grime and will aide in avoiding damage. Meguiars do a product called All purpose cleaner ( APC ) which also works really well with the cause here.
Try and pick products that are Ph balanced, this will reduce the chance of the chemicals breaking down any protectant that are on the car ( Waxes, polishes, glazes, etc, more on them later ).
If you can then use a foam lance with your pressure washer, this is a great way to get the wash chemical onto the car, again its all about reducing the amount of contact you have with the paintwork. I always soap the car, leave to dwell then rinse off, followed by a further soaping.
Get yourself 2 buckets ( Always talked about as the 2 bucket method, hey its not difficult to understand why...... ) and if you feel the need and have the luxury then get a grit guard too. Basically its a plastic grid that fits into the bottom of your rinse bucket to trap as much dirt as possible down there and avoid it coming onto your mitt, again all in the best interests of reducing the amount of debris being put into contact with the paintwork.
A Good quality wash mitt is always a sound investment, lambswool ones work really well, wash well and last a long long time, so maybe the initial investment is a little higher but well worth it in the long run.
A Good quality shampoo is again a great thing to have. Many of the high street brands are up to the job, Meguiars have a great range thats well up to the job. Specialist outlets will stock other products like chemical guys, poorboys, duragloss ( My own fav at the moment ) but its down to your own preference and how convenient it is to wait for things to arrive in the post rather than pop out and collect it.
Just remember something else, companies like Turtle wax etc have been around for years, i'm not believing for a second they have all of a sudden forgotten how to make quality products, they have been around for a long time for a reason!!!
So onto washing, one of the buckets should have your shampoo in there, other bucket just water for rinsing the mitt. starting at the roof with your clean mitt, wash down panel by panel, rinsing your mitt frequently in your rinse bucket, using the grit guard ( if you have one ) to remove any particles in the mitt. Then back into your (clean) soap bucket to load up again prior to your next panel.
Once finished, I soap the car again with the lance ( My own preference, everyone is different ) before rinsing off with the power washer ( Again at an angle to the car and not direct ).
As you will understand the above is only a guide, everyone is different, but I find that the best way to reduce the amount of damage caused to the surface of the car.
Ok so once the defects are at a level that you decide its time to address and sort these out what happens?
If you have your own machine polishing equipment and your pretty handy with it then you will already know what the deal is here.
If not, then I won't go into too much detail, again just the basics.
A Pro detailer will start by measuring the paint thickness of a vehicle. This can typically vary from 90 microns up to over 200 on a quality finish. This is an overall thickness reading taken with a PTG ( Paint thickness guage ) where its really only the thickness of the clearcoat ( Lacquer ) that is a concern, this is the layer that is manipulated with the polishing process. Specialist guages can determine the different layers of paint, from the substrate material, primer, colour and the lacquer.
The process of correction is quite simple, if you were to magnify the surface of the paint it would resemble something very rough. This would include contaminants on the surface along with defects that had penetrated the finish. Now in typical circumstances these will be 3 to 4 microns deep. For correction this top layer of paint is removed, taking with it these small defects that were visible. Some random deep scratches ( RDS ) will be evident on many cases, its up to the detailer and indeed the vehicle owner how far they want to go with this in order to get the best possible result. If the defects are quite bad then the process of wet sanding can be used to obtain a uniform finish to an area then polished up. The area is then refined with a compound which is less abrasive and serves to remove the (uniform) scratches left from the correction process.
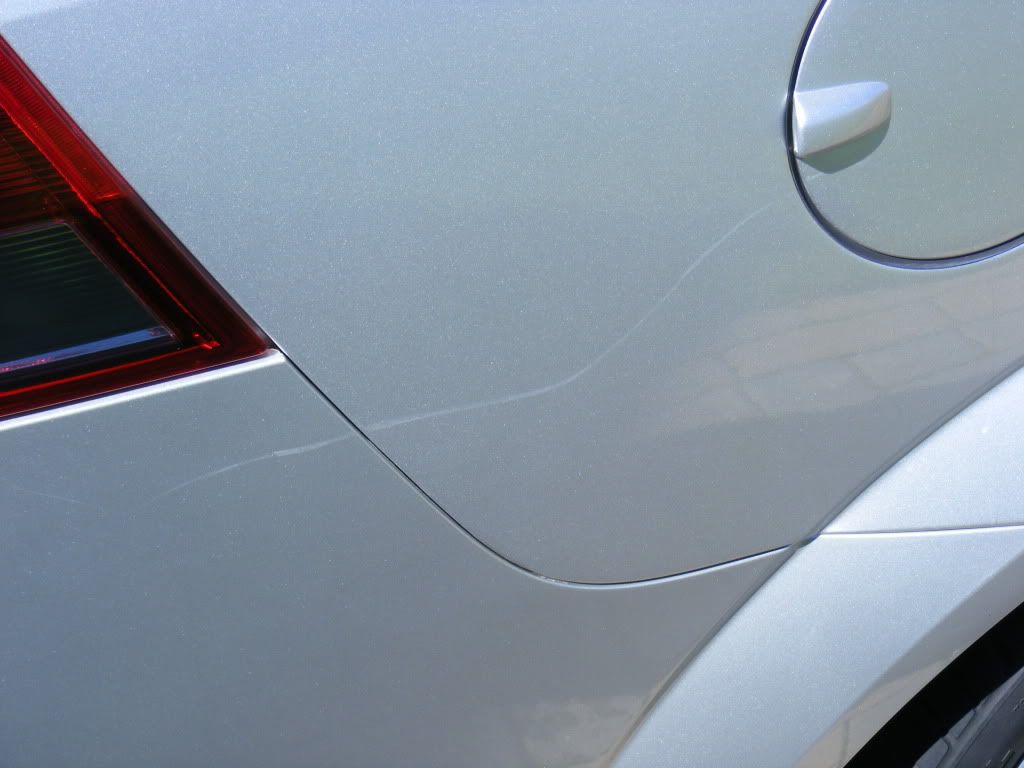
To give an idea what can be done for scratches too, here is the side of a car with what looked liek quite a bad scratch:-
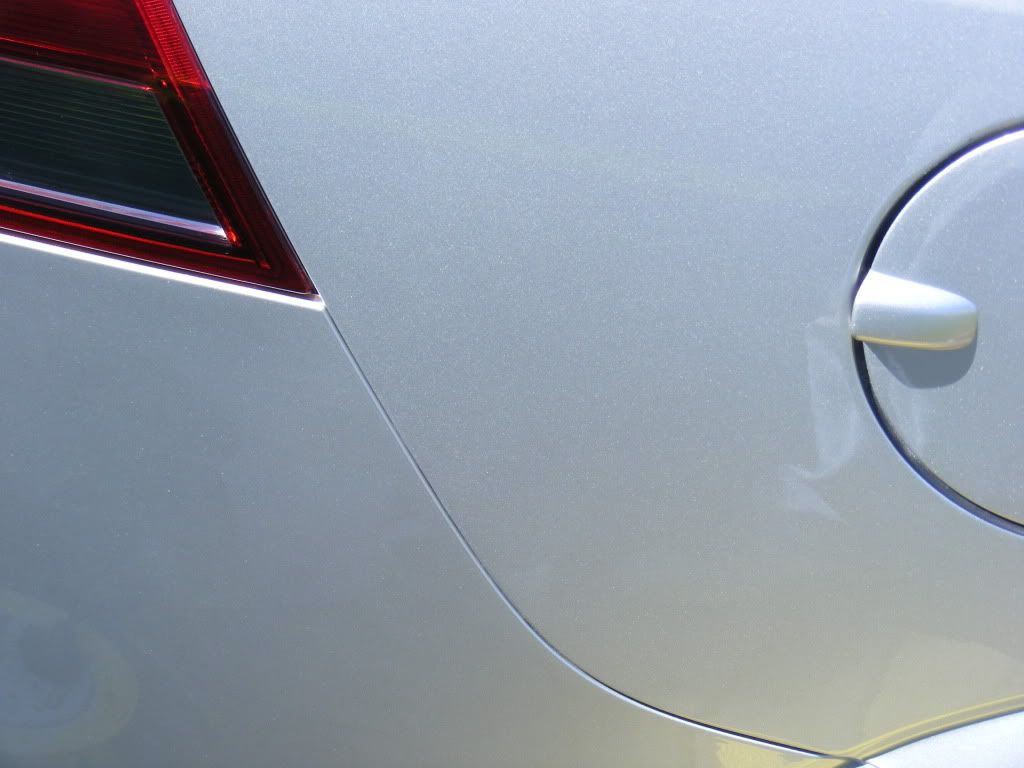
And after correction:-
As for equipment, rotary polishers are what a detailer will use. Its the most effective and efficient way of correcting paintwork. Dual action machines can be used but these tend to be a lot more gentle in the way they operate and take a lot more time to get results with. the flip side is the opportunity to cause damage or remove paint is greatly reduced but a good detailer should be more than confident with a rotary.
A Huge selection of pads are available, from hard compounding pads through to very soft finishing pads, 3 inch, 4 inch, 6 and 8 inch, the whole range is a must for a pro detailer as you need the full range to be there for all eventualities.
The same goes for compounds. Many manufacturers are out there, from 3M, Meguiars, Menzerna, all of which have a great range - Its up to the individual which they choose but many have good and bad points, working temperature etc so as with the pads, a whole range of compounds is a must for a pro.
Just to give an indication, between pads, backing plates and compounds, If I had to replace them all at once I would be around the
________________________________________
Rules and tools of life:-You only need two tools: WD-40 and Duct Tape. If it doesn't move and should, use the WD-40. If it shouldn't move and does, use the duct tape
Team Roofrack.........


 allyrennie
 when i can be arsed I take cleaning seriously and try to cause minimal damage to the paintwork whilst washing, and this has helped me understand things much better. Just a shame i can't/darn't use an orbital on the wallye


 Project thread